Let’s talk about something most people never think about until there’s a problem: your pelvic floor. You probably have a regular workout routine with cardio, weights, and maybe some yoga.
But when’s the last time you thought about strengthening the muscles that support your bladder, bowel, and reproductive organs?
Here’s the thing—your pelvic floor deserves just as much attention as your biceps or abs.
The good news is that strengthening these muscles is easier than you might expect.
Strengthening these muscles is simpler than you think, and the exercises fit almost anywhere. Let’s dive in.
What Is The Pelvic Floor?
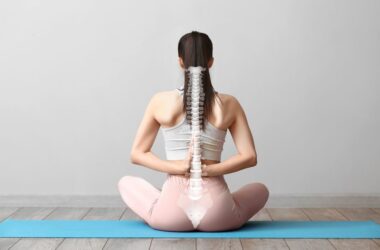
Picture your pelvic floor as a hammock of muscles across your pelvis. This muscular sling runs from the pubic bone to the tailbone, supporting everything above.
These hardworking muscles have several important jobs:
Support organs – They hold your bladder, bowel, and reproductive organs against gravity and pressure.
Helping you stay dry – They work with your sphincter muscles to control when you urinate and have bowel movements.
Enhance sexual health – A responsive pelvic floor increases sensation and function for men and women.
Stabilize your core – These muscles, with your diaphragm and abdominals, help stabilize your spine during movement.
You might be wondering why all this focus on the pelvic floor matters. Let’s explore the benefits.
Many think pelvic floor exercises are only for women after childbirth. Not so! Everyone—regardless of gender or parenthood—benefits from a strong pelvic floor.
Your pelvic floor can be affected by pregnancy and childbirth, aging, chronic coughing, heavy lifting, high-impact activities like running, weight changes, and even chronic stress. Over time, these factors can lead to issues like leaking urine when you sneeze, urgency, difficulty with bowel movements, or discomfort during sex.
Quick note: If you’re already experiencing symptoms like incontinence, pelvic pain, or a feeling of heaviness, it’s worth seeing a pelvic floor physical therapist. They can assess whether your muscles need strengthening, relaxation, or both, and create a personalized plan for you.
Finding Your Pelvic Floor Muscles
Before you can strengthen these muscles, you need to know how to properly engage them. Here’s how to find them:
For the front part (urinary muscles): Imagine you’re urinating and try to stop the flow midstream. Those are the muscles! (Just don’t practice this during actual urination—it’s just a visualization tool.)
For the back (bowel muscles): Imagine trying to stop gas from passing. That gentle squeeze activates your posterior pelvic floor.
For women: Some find it helpful to imagine gently drawing something up into the vagina and lifting it upward.
Common mistakes to avoid:
- Holding your breath (keep breathing naturally!)
- Squeezing your buttocks or inner thighs
- Pulling in your stomach excessively
- Bearing down instead of lifting up
The movement is subtle and internal. Done right, you’ll feel a gentle lift and squeeze; no one should notice.
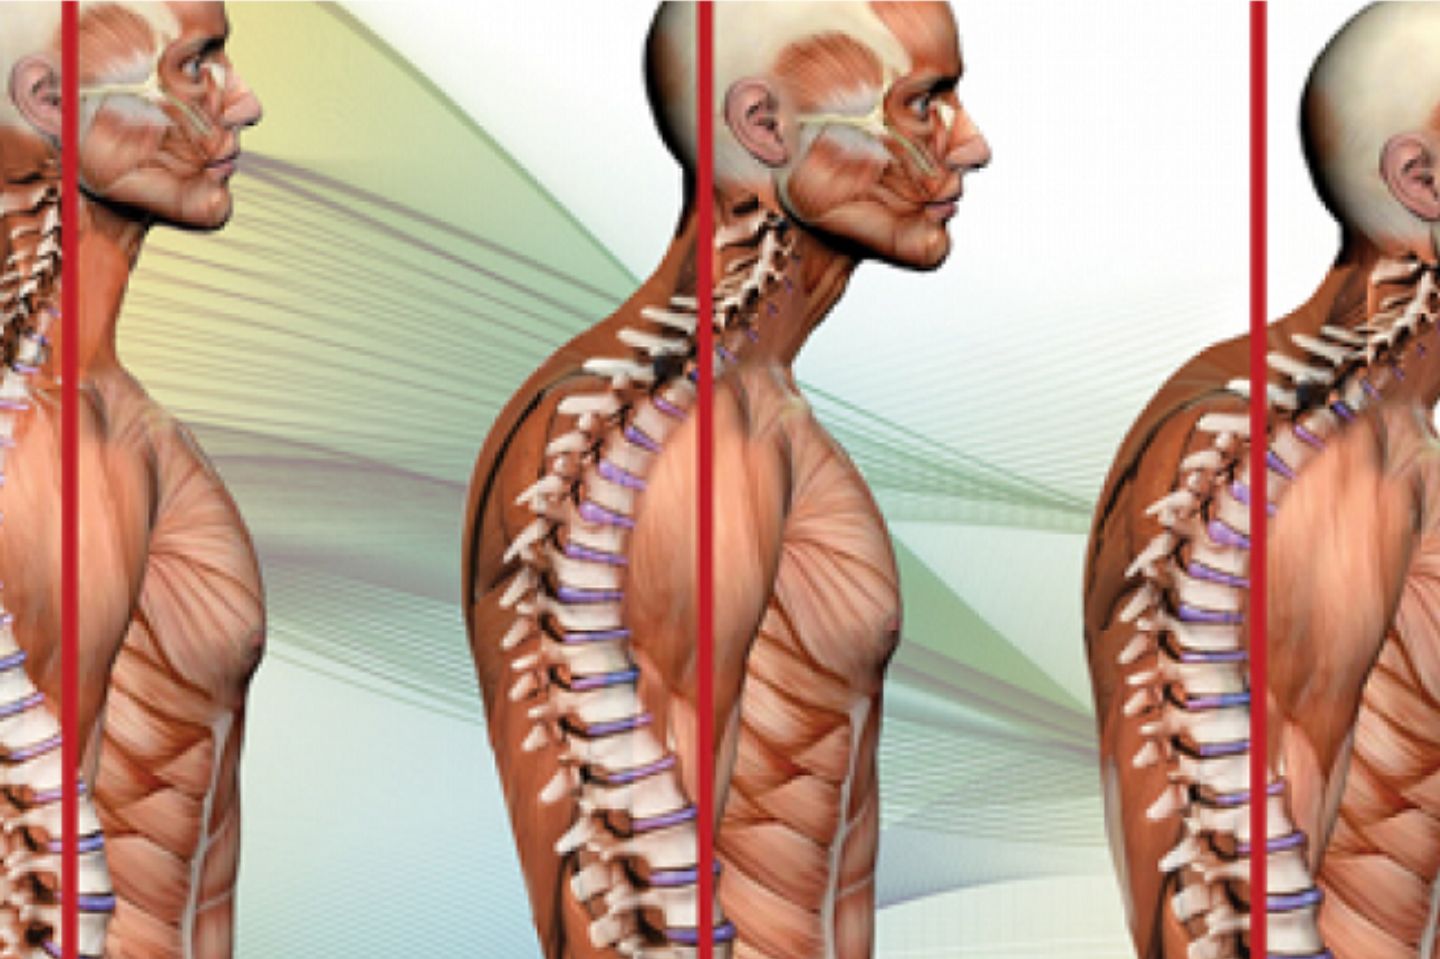
The Breathing Connection
Here’s something interesting: your pelvic floor and diaphragm work together as a coordinated system. When you breathe in, your diaphragm moves down, and your pelvic floor gently relaxes and descends. When you breathe out, both lift naturally back up.
This coordination matters. A healthy pelvic floor contracts when needed and relaxes between. Constant tension is as problematic as weakness.
The Essential Pelvic Floor Exercises
Now for the main event—let’s get into the exercises themselves. Start with these foundational movements and progress gradually.
1. Basic Kegel Exercises
Kegels are the most well-known pelvic floor exercises, and they’re effective when done correctly. Quality matters much more than quantity here.
Starting Position: Lie on your back with your knees bent and your feet flat on the floor. This position makes it easier to isolate the pelvic floor muscles. As you get stronger, you can do these sitting or standing.
The Exercise:
- Take a relaxed breath in, allowing your pelvic floor to relax.
- As you exhale, gently contract your pelvic floor muscles to simulate stopping urine flow.
- Hold the contraction for 5-10 seconds while breathing normally.
- Completely relax the pelvic floor for 5-10 seconds before starting the next repetition.
- Repeat 10 times
Progression: Start with 3-5 second holds if 10 seconds feels too challenging. Work your way up gradually over several weeks.
How Often: Aim for 3 sets per day. You can do one set in the morning, one at lunch, and one before bed. Some people find it helpful to link their Kegel routine to daily activities, such as brushing their teeth or during their commute.
Advanced Variation: Once you’ve mastered the basic hold, try “quick flicks”—rapid contractions for 1-2 seconds followed by full relaxation. Do 10 quick flicks, then rest. This trains the fast-twitch muscle fibers that respond to sudden movements, such as sneezing.
2. Diaphragmatic Breathing with Pelvic Floor Coordination
This exercise helps you coordinate your breathing with pelvic floor movement, creating a more functional pattern.
Starting Position: Lie on your back with knees bent, or sit comfortably in a chair.
The Exercise:
- Place one hand on your chest and one on your belly.
- Inhale slowly through your nose. Let your belly rise; keep your chest still.
- As you inhale, consciously allow your pelvic floor to relax and gently descend.
- Exhale slowly through your mouth, feeling your belly soften.
- As you exhale, gently engage your pelvic floor, drawing it up and in
- Repeat for 5-10 breaths.
Why This Matters: This coordination pattern supports your pelvic floor during everyday activities and helps prevent excessive bearing down or breath-holding.
How Often: Practice 2-3 times daily, especially before doing other exercises.
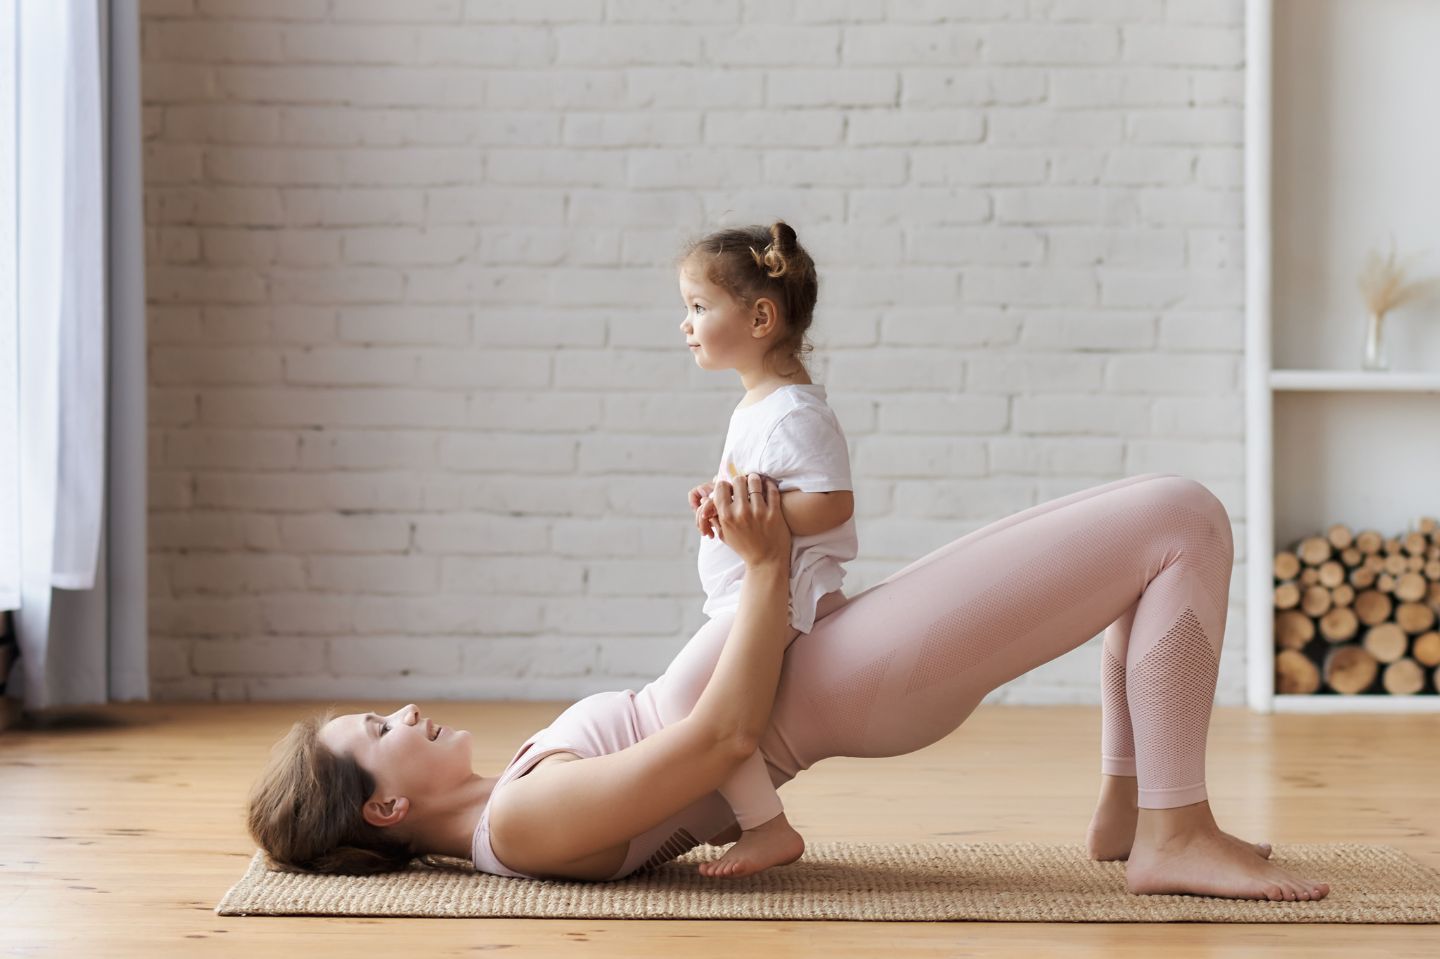
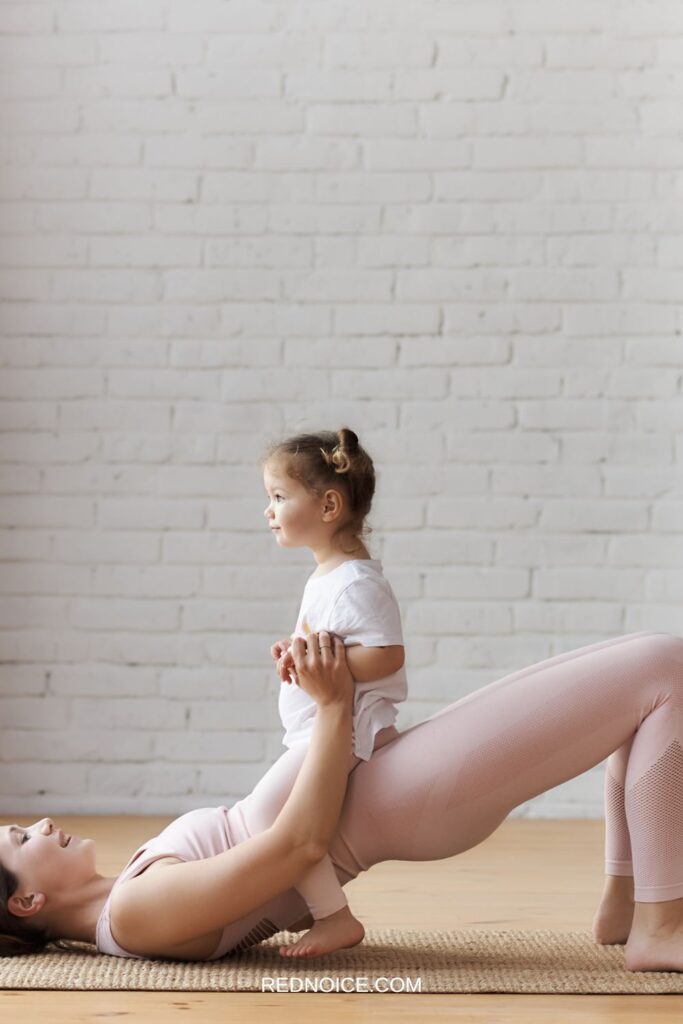
3. Bridge with Pelvic Floor Engagement
This exercise combines pelvic floor work with glute and core strengthening, making it more functional for real-world movements.
Starting Position: Lie on your back with knees bent, feet flat on the floor about hip-width apart, arms relaxed at your sides.
The Exercise:
- Inhale to prepare, then relax your pelvic floor.
- As you exhale, gently engage your pelvic floor.
- Keeping that engagement, press through your feet and lift your hips toward the ceiling.
- Your body should form a straight line from your shoulders to your knees.
- Hold for 3-5 seconds, continuing to breathe.
- Lower slowly with control, maintaining pelvic floor engagement.
- Fully relax your pelvic floor once you’re back down.
- Repeat 10-15 times
Progression: Hold the bridge position longer (up to 10 seconds) or try single-leg bridges once the basic version feels easy.
How Often: 2-3 times per week as part of your strength training routine.
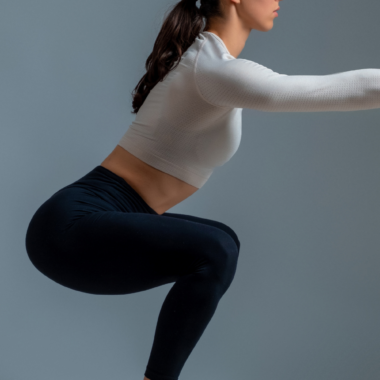
4. Squats with Pelvic Floor Awareness
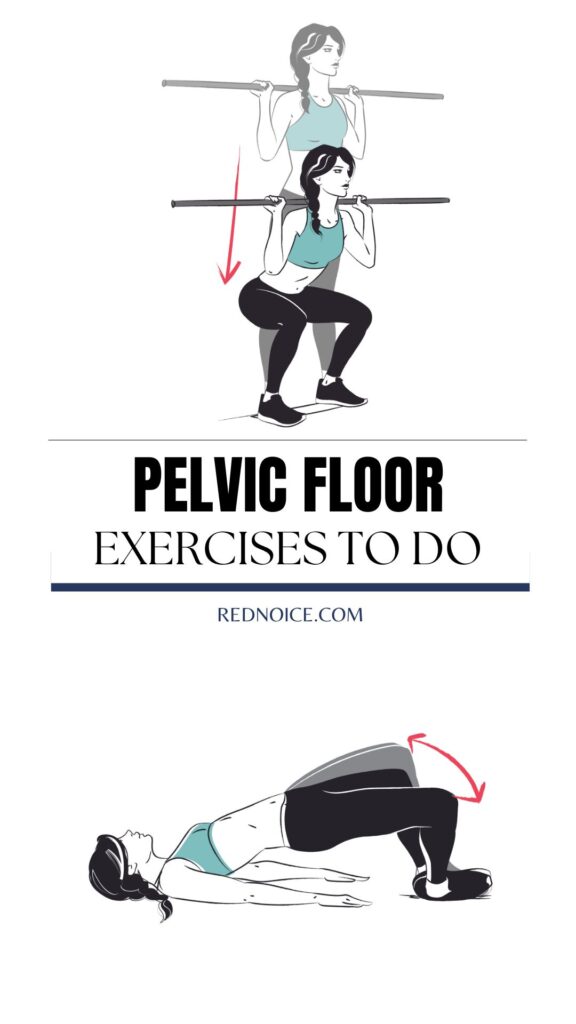
Squats are excellent for overall lower-body and core strength, and they can be done with pelvic floor engagement for added benefit.
Starting Position: Stand with feet hip to shoulder-width apart, toes pointing slightly outward.
The Exercise:
- Inhale as you lower into a squat (as if sitting back into a chair), allowing your pelvic floor to relax and accommodate the movement
- Keep your chest up and weight in your heels.
- As you exhale and stand back up, engage your pelvic floor and lift through your core.
- At the top, feel that gentle pelvic floor lift.
- Repeat 10-15 times
Start with bodyweight squats. Once comfortable with good pelvic floor control, add light weights.
How Often: 2-3 times per week.
Important tip: Never hold your breath or bear down during squats. The exhale-and-engage pattern protects your pelvic floor from excessive downward pressure.
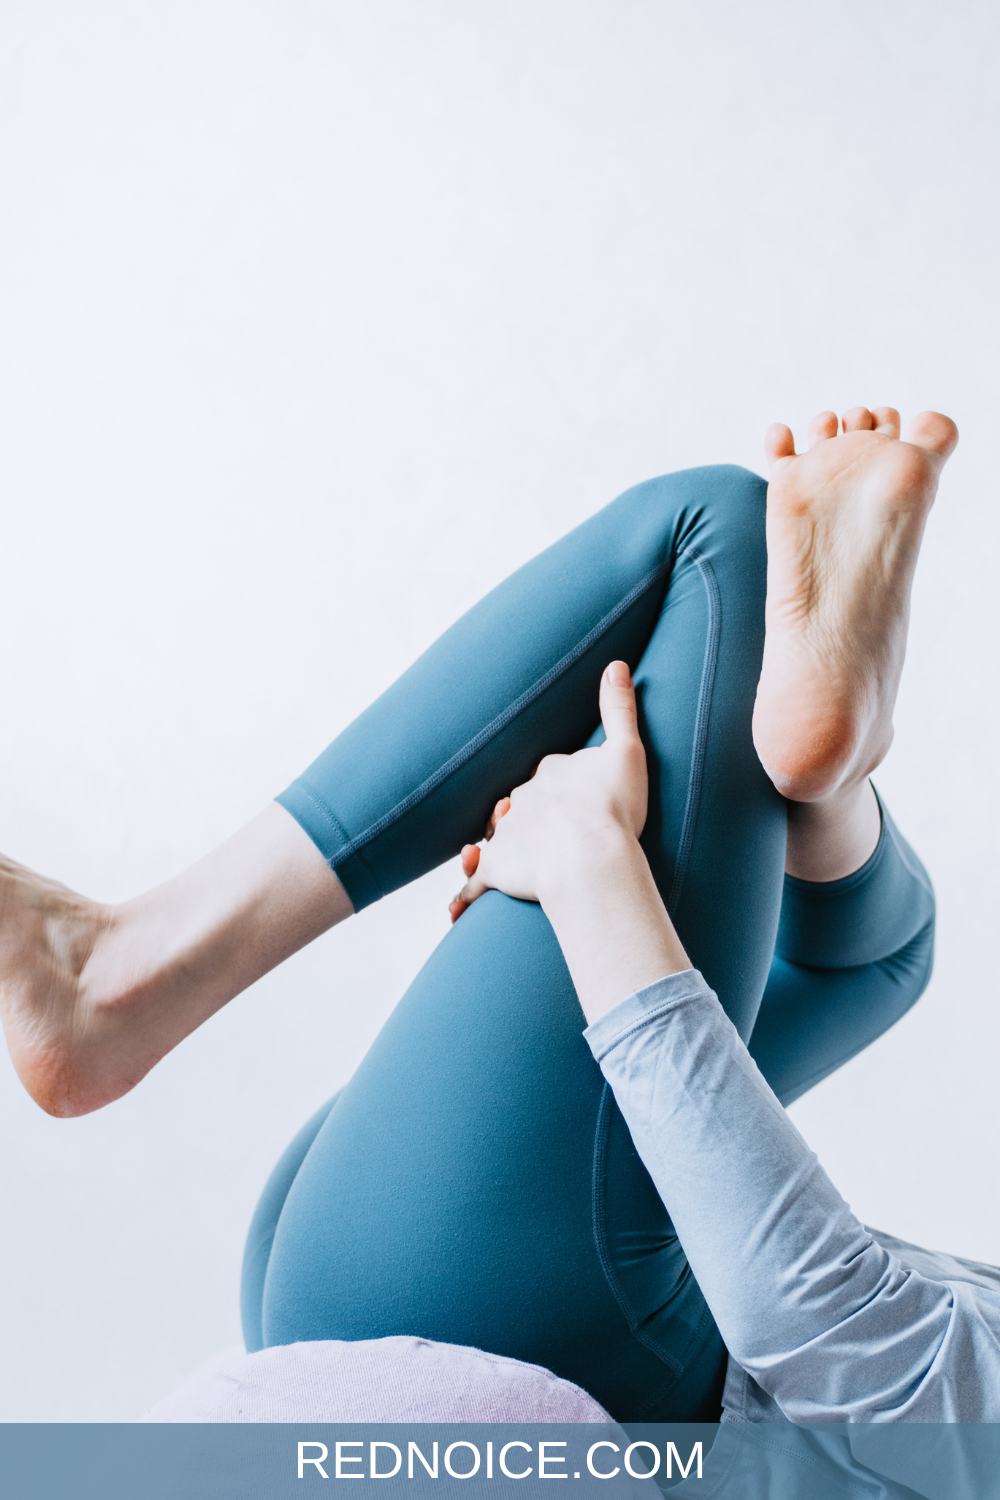
5. Dead Bug with Pelvic Floor Control
This core exercise challenges your ability to maintain pelvic floor engagement while moving your limbs—great for functional strength.
Starting Position: Lie on your back with arms extended toward the ceiling and knees bent at 90 degrees (shins parallel to the floor).
The Exercise:
- Exhale and gently engage your pelvic floor and core.
- Slowly lower your right arm overhead while straightening your left leg, hovering it a few inches off the ground.
- Keep your low back gently pressed toward the floor.
- Inhale as you return to the starting position
- Exhale and repeat on the opposite side (left arm, right leg)
- Complete 10-12 repetitions per side
Progression: Move more slowly for increased challenge, or hover the extending leg closer to the ground.
How Often: 2-3 times per week.
6. Wall Sits with Pelvic Floor Pulses
This exercise builds endurance in both your leg muscles and pelvic floor.
Starting Position: Stand with your back against a wall, feet about 2 feet away from the wall.
The Exercise:
- Slide down the wall until your thighs are parallel to the floor, as if sitting in an invisible chair. Keep your back pressed against the wall.
- Find a comfortable breathing rhythm.
- Perform 10 quick pelvic floor contractions (1-2 seconds each with brief relaxation between)
- Fully relax your pelvic floor and stand back up.
- Rest for 30 seconds, then repeat 2-3 times.
How Often: 2-3 times per week.
7. Standing Marches with Coordination
This functional exercise mimics walking while maintaining pelvic floor control—perfect for preventing leakage during daily activities.
Starting Position: Stand with feet hip-width apart, hands on hips or holding onto a countertop for balance.
The Exercise:
- Engage your pelvic floor gently.
- Slowly lift your right knee toward your chest (like marching in place)
- Maintain your pelvic floor engagement throughout
- Lower your foot with control.
- Repeat with the left leg.
- Continue alternating for 20 total marches (10 per leg)
Progression: Try this without holding onto anything for balance, or increase your speed slightly once you have reasonable control.
How Often: Daily, or 5 times per week.
Creating Your Pelvic Floor Exercise Routine
Here’s a sample weekly routine that incorporates all these exercises:
Daily (takes about 5 minutes):
- 3 sets of Kegel exercises (10 reps each set, spread throughout the day)
- 1 set of diaphragmatic breathing (5-10 breaths)
3 times per week (takes about 15-20 minutes):
- Bridges: 3 sets of 10-15 reps
- Squats: 3 sets of 10-15 reps
- Dead bugs: 3 sets of 10-12 reps per side
- Wall sits with pulses: 3 sets of 10 pulses.
- Standing marches: 2 sets of 20 total marches
Remember: Start slowly if you’re new to pelvic floor exercises. It’s better to do fewer repetitions with good form than many repetitions with poor technique.
Tips for Success
Be consistent: Like any muscle training, results come with regular practice. Most people notice improvements within 4-6 weeks of regular exercise.
Don’t overdo it: More isn’t always better. Over-exercising your pelvic floor can lead to excessive tension and make problems worse. Stick to the recommended frequency.
Pay attention to your body: These exercises shouldn’t cause pain. If you experience discomfort, stop and consult with a healthcare provider or pelvic floor physical therapist.
Make it a habit: Link your exercises to existing daily routines. Do Kegels while brushing your teeth, at red lights, or during your morning coffee.
Track your progress: Keep a simple log of your exercises for the first few weeks. This helps you stay accountable and notice improvements.
Stay patient: Pelvic floor muscles can take time to strengthen, especially if they’ve been weak for a while. Stick with it!
When to Seek Professional Help
While these exercises are safe and beneficial for most people, sometimes professional guidance is needed. Consider seeing a pelvic floor physical therapist if:
- You’re not sure if you’re doing the exercises correctly.
- You’ve been exercising consistently for 8-12 weeks without improvement.
- You experience pain during the exercises.
- You have symptoms like incontinence, prolapse, or pelvic pain.
- You’re pregnant, postpartum, or recovering from pelvic surgery.
A pelvic floor PT can perform an assessment and create a personalized program tailored to your specific needs. They can also determine if your pelvic floor is too tight (not just weak), which requires a different approach.
The Bottom Line
Your pelvic floor is working for you every single day, supporting your organs, controlling your bladder and bowel, and stabilizing your core. Isn’t it time you showed these hardworking muscles some love?
The exercises in this guide can be done almost anywhere, require no equipment, and take just minutes per day. Start with the basics—Kegels and breathing coordination—then gradually add the functional exercises as you build strength and confidence.
With consistent practice, you’ll likely notice improvements in bladder control, core stability, and overall pelvic health. You’re investing in your long-term wellness, reducing your risk of incontinence and other pelvic floor issues down the road.
Ready to get started? Begin with just one set of Kegels today. Your future self will thank you!
Note from a Physical Therapist:
This article provides educational information about pelvic floor exercises based on established physical therapy practices. While these exercises can be beneficial for many people, it’s always a good idea to check with your healthcare provider before starting any new exercise program, especially if you’re experiencing symptoms or have health concerns.
About the Author: This article was written by a licensed physical therapist with expertise in pelvic floor health. The exercises presented are based on current evidence-based practice guidelines.
Works Cited
- Cho ST, Kim KH. Pelvic floor muscle exercise and training for coping with urinary incontinence. J Exerc Rehabil. 2021 Dec 27;17(6):379-387. doi: 10.12965/jer.2142666.333. PMID: 35036386; PMCID: PMC8743604.