Gluten-free meal prep doesn’t have to mean bland chicken and rice or the same salad five days in a row. With the right sauces, spices, and sides, gluten-free eating can be just as satisfying as any other way of cooking — and it can absolutely work for busy weekdays.
Every recipe in this list is gluten-free and dairy-free, and most are high-protein gluten-free meals that work for easy gluten-free lunch ideas, gluten-free lunch ideas for work, quick gluten-free dinner, or dairy-free meal prep. You’ll find everything from a gluten-free teriyaki chicken bowl that scratches the takeout itch to quinoa tabbouleh boxes with grilled chicken, turkey taco salad, and a simple salmon and sweet potato bowl.
If you’re new to gluten-free cooking, these are also gluten-free beginner-friendly recipes — no complicated techniques, no hard-to-find ingredients, and no sacrificing flavor. And if you’re following a gluten-free renal diet, there are notes throughout on how to adjust sodium, potassium, and phosphorus.
Why Gluten-Free Meal Prep Works
Naturally gluten-free foods are everywhere. Rice, quinoa, potatoes, sweet potatoes, vegetables, fruit, eggs, meat, poultry, fish, beans, and legumes are all naturally gluten-free before sauces and seasonings get involved.
Dairy-free is easy to achieve. Olive oil, coconut oil, avocado, coconut yogurt, and dairy-free sauces add creaminess without dairy.
High protein keeps you full. Chicken, turkey, beef, salmon, and eggs are all naturally gluten-free and high in protein, which helps you stay satisfied through the workday.
Batch cooking saves time and money. Cook once on Sunday, and you’ve got gluten-free lunch ideas for work ready to grab all week.
Freezer-friendly. Most gluten-free meal prep recipes freeze well, so you can double a recipe and stash half for later.
Works for lunch or dinner. These recipes are just as good in a lunchbox as they are on a dinner plate.
How to Build a Balanced Gluten-Free Meal Prep Bowl
Use this simple formula:
- Protein: chicken, turkey, beef, salmon, eggs, tofu, or chickpeas
- Carb: rice, quinoa, cauliflower rice, sweet potato, spaghetti squash, or gluten-free pasta
- Vegetables: broccoli, green beans, peppers, zucchini, kale, carrots, spinach, or cucumber
- Sauce: gluten-free teriyaki sauce, chimichurri, dairy-free ranch, salsa, or marinara
- Healthy fat: olive oil, avocado, olives, or sesame oil
Keep sauces and crunchy toppings separate until you’re ready to eat so everything stays fresh.
1. Gluten-Free Teriyaki Chicken Bowl (Crockpot Option)
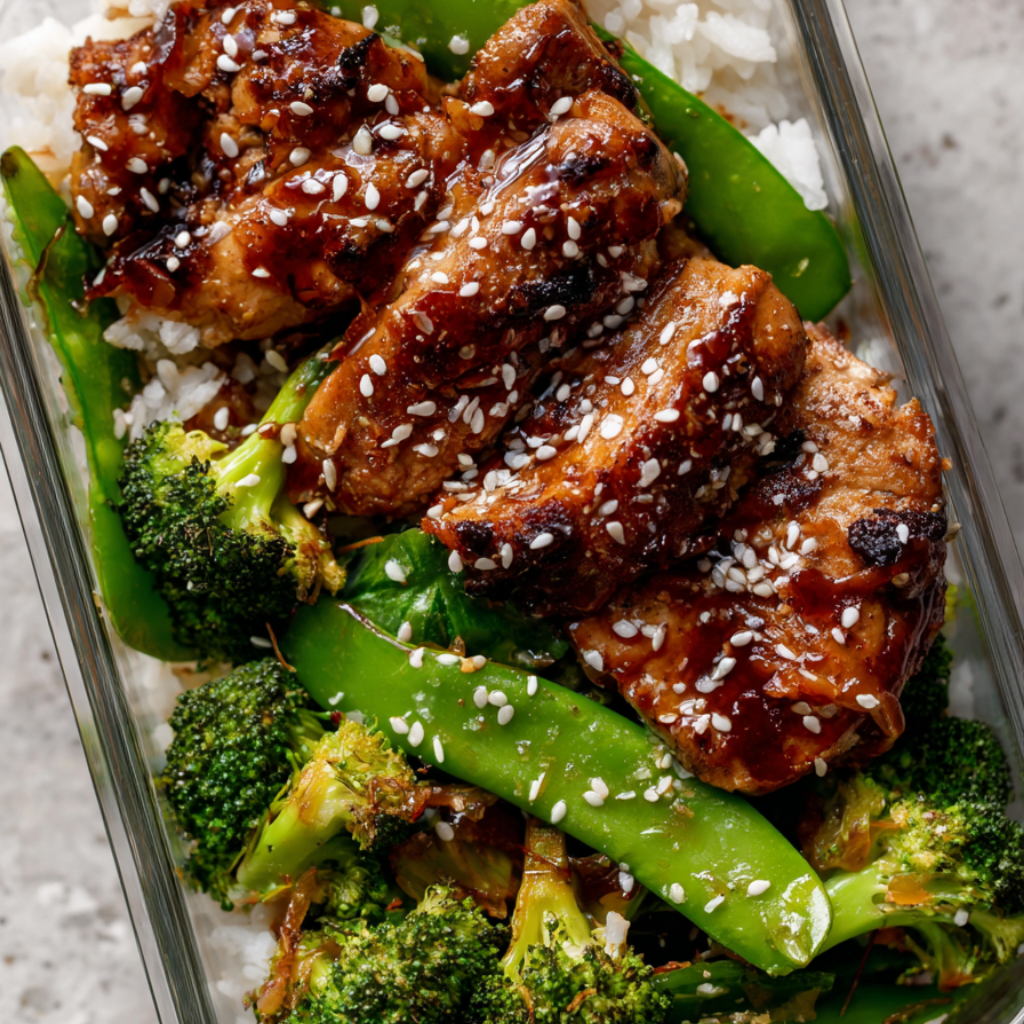
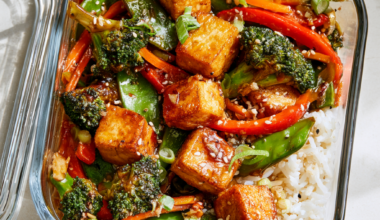
This is the gluten-free teriyaki chicken everyone loves — sweet, savory, and better than takeout. To make this gluten-free, use gluten-free tamari instead of regular soy sauce. No soy sauce, no dairy, and no gluten. It’s one of the easiest gluten-free meals, quick enough for weeknights and perfect for gluten-free lunch ideas for work.
Crockpot option: Add chicken, sauce, and garlic to the slow cooker. Cook on low for 4–5 hours. Add broccoli during the last 30 minutes.
Meal prep note: Divide into 4 containers with rice or cauliflower rice. This sauce also works as a gluten-free teriyaki sauce for beef or tofu.
2. Buffalo Chicken & Cauliflower Rice Bowls
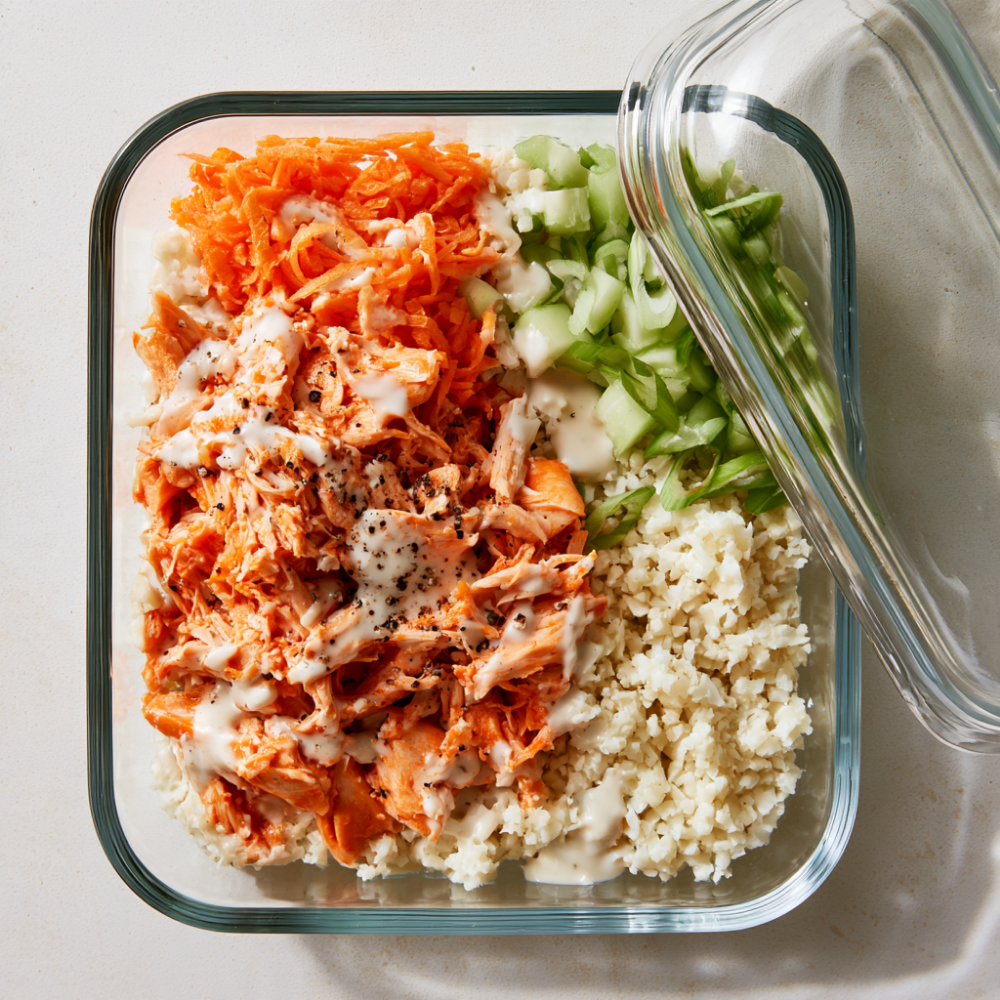
These buffalo chicken bowls have all the spicy, tangy flavor of buffalo wings in an easy meal-prep format. Tender shredded chicken is tossed with gluten-free buffalo sauce and served over cauliflower rice with crisp celery, sweet carrots, and green onions. A drizzle of dairy-free ranch adds a cool, creamy finish.
Serves: 4
Prep Time: 15 minutes
Cook Time: 20 minutes
Total Time: 35 minutes
Ingredients
- 1½ lbs boneless, skinless chicken breasts
- ⅔ cup gluten-free buffalo sauce, plus more to taste
- 1 tbsp olive oil
- 4 cups cauliflower rice, fresh or frozen
- 2 celery stalks, finely diced
- 1 cup shredded carrots
- 2 green onions, thinly sliced
- ½ tsp garlic powder
- Salt and black pepper, to taste
- Dairy-free ranch dressing, for serving
- Optional: chopped fresh parsley or cilantro
Instructions
- Cook the chicken. Season the chicken breasts lightly with salt and pepper. Bake at 400°F for 20–25 minutes, or until the thickest part reaches 165°F. Let rest for 5 minutes, then shred with two forks.
- Sauce the chicken. Toss the shredded chicken with ½ cup buffalo sauce. Add more if you prefer a saucier bowl.
- Cook the cauliflower rice. Heat the olive oil in a large skillet over medium-high heat. Add the cauliflower rice and garlic powder. Cook for 5–7 minutes, stirring occasionally, until tender and most of the excess moisture has evaporated. Season with salt and pepper.
- Assemble the bowls. Divide the cauliflower rice among four glass meal-prep containers. Add the buffalo chicken, celery, carrots, and green onions.
- Finish when serving. Pack the ranch separately and drizzle over the bowl just before eating.
Meal Prep Tips
Let the chicken and cauliflower rice cool before sealing the containers. Store the ranch separately to keep the vegetables crisp.
For the best texture, eat within 3–4 days. Reheat the chicken and cauliflower rice, then add the cold vegetables and ranch after heating.
Gluten-free note: Check the label on your buffalo sauce and ranch dressing, since formulations vary by brand.
3. Quinoa Tabbouleh & Grilled Chicken Boxes
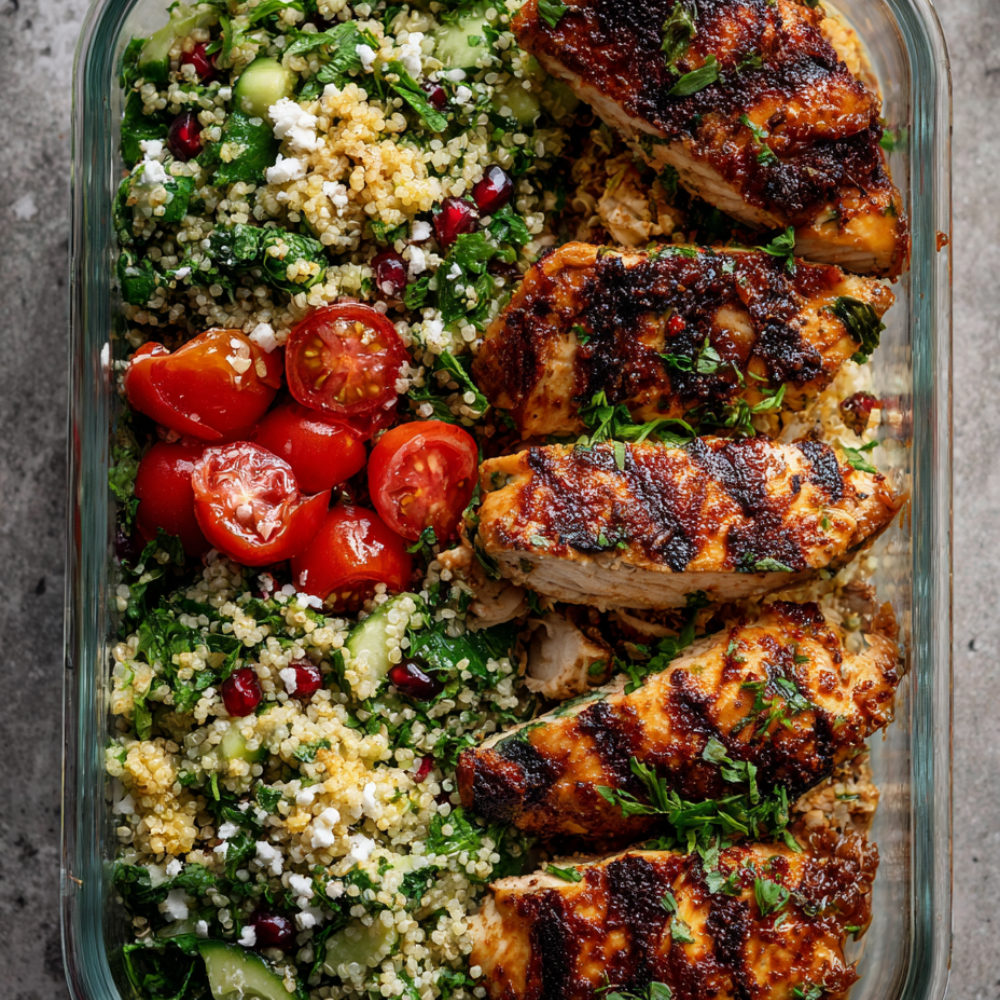
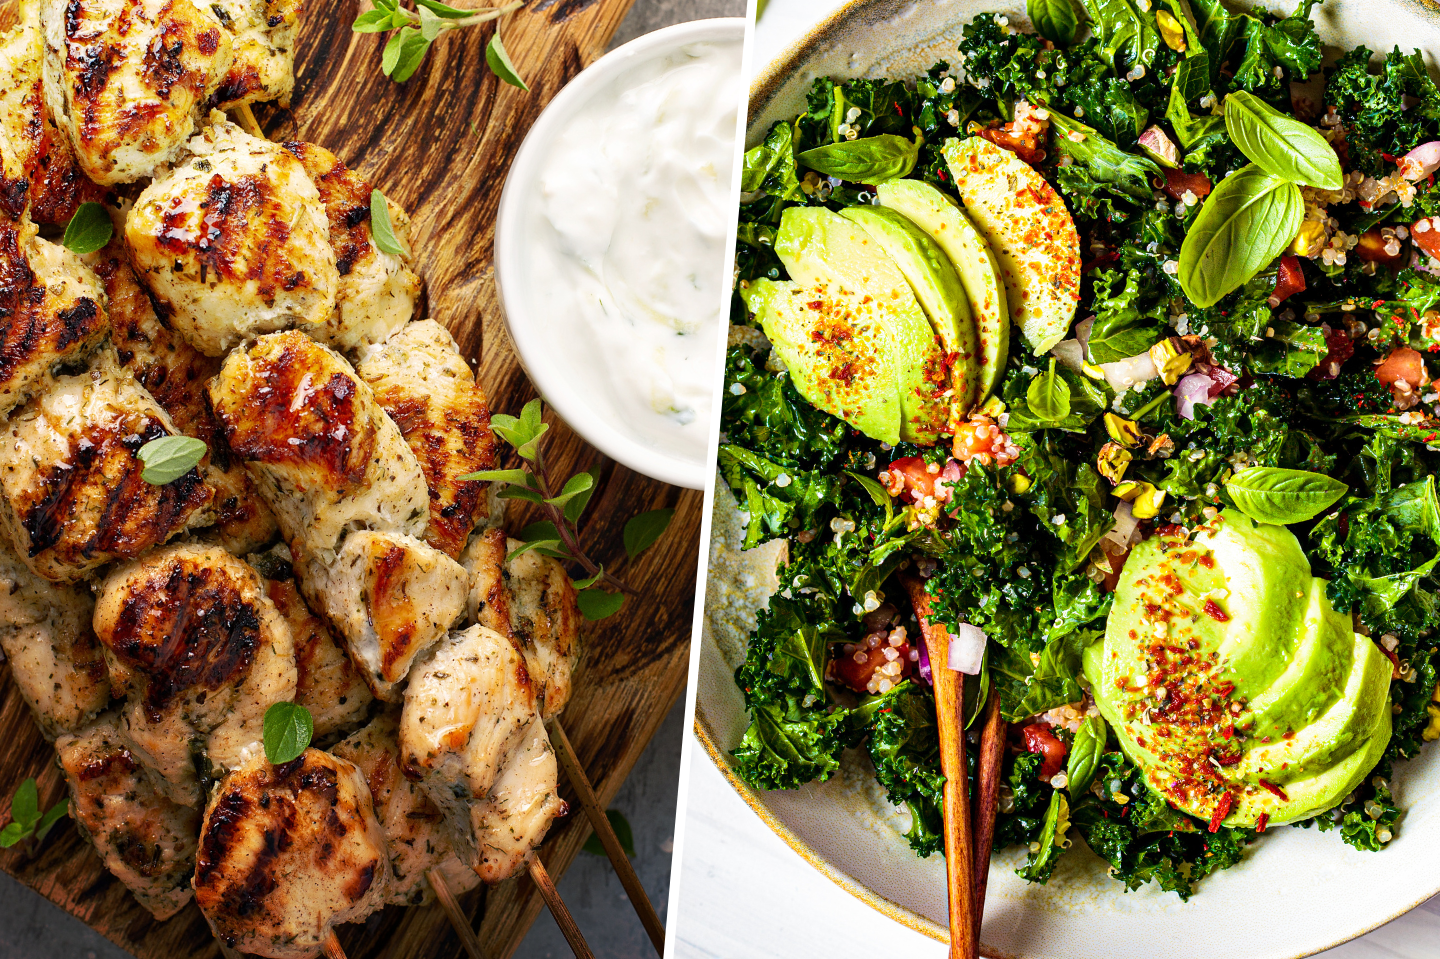
Traditional tabbouleh uses bulgur, but quinoa makes a satisfying gluten-free alternative. This version combines fluffy quinoa with plenty of fresh parsley and mint, juicy tomatoes, crisp cucumber, and a bright lemon-garlic dressing. Add sliced grilled chicken for a fresh, filling lunch that holds up beautifully in the refrigerator.
Serves: 4
Prep Time: 20 minutes
Cook Time: 12 minutes
Total Time: 32 minutes
Ingredients
For the Chicken
- 1½ lbs boneless, skinless chicken breasts
- 1 tbsp olive oil
- 1 tsp dried oregano
- 2 cloves garlic, minced
- ½ tsp salt
- ¼ tsp black pepper
For the Quinoa Tabbouleh
- 2 cups cooked quinoa, completely cooled
- 1 cup finely chopped flat-leaf parsley
- ½ cup chopped fresh mint
- 1 cup cherry tomatoes, halved
- 1 medium cucumber, diced
- 3 green onions, thinly sliced
For the Dressing
- ¼ cup extra-virgin olive oil
- 3 tbsp fresh lemon juice
- 1 clove garlic, finely minced
- ½ tsp salt
- ¼ tsp black pepper
Instructions
- Season the chicken. Rub the chicken with olive oil, oregano, garlic, salt, and pepper.
- Cook the chicken. Grill or pan-sear over medium-high heat for about 5–7 minutes per side, depending on thickness, until the thickest part reaches 165°F. Let rest for 5–10 minutes, then slice against the grain.
- Make the tabbouleh. Combine the cooled quinoa, parsley, mint, tomatoes, cucumber, and green onions in a large bowl.
- Make the dressing. Whisk together the olive oil, lemon juice, garlic, salt, and pepper. Pour over the quinoa mixture and toss gently.
- Pack the containers. Divide the quinoa tabbouleh among four glass containers and arrange the sliced chicken alongside it. Add a lemon wedge to each container if desired.
Meal Prep Tips
Cool the chicken completely before sealing the containers. You can make the tabbouleh a day ahead, and its flavor actually improves as the herbs and lemon dressing mingle.
For the freshest texture, keep the chicken and tabbouleh in separate sections of the container rather than mixing them.
Gluten-free note: Quinoa is naturally gluten-free, but use certified gluten-free products if cross-contact is a concern.
4. Turkey Meatballs with Zucchini Noodles & Marinara
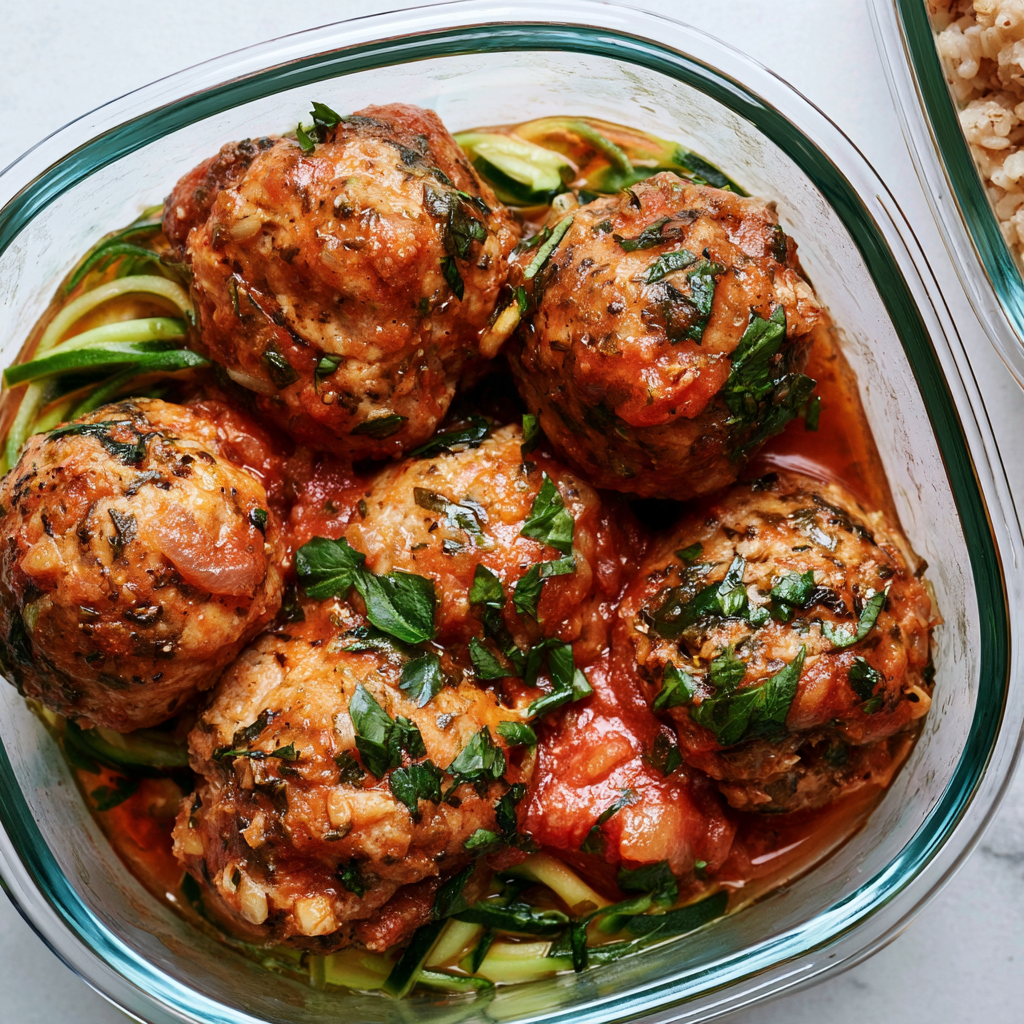
These tender turkey meatballs use almond flour instead of breadcrumbs, making them naturally gluten-free and dairy-free. They’re served over lightly cooked zucchini noodles with a simple marinara for a lighter meal that still feels satisfying.
Serves: 4
Prep Time: 20 minutes
Cook Time: 25 minutes
Total Time: 45 minutes
Ingredients
For the Meatballs
- 1 lb ground turkey
- 1 large egg
- ¼ cup almond flour
- 1 tsp dried oregano
- 1 tsp garlic powder
- ½ tsp onion powder
- ¾ tsp kosher salt
- ¼ tsp black pepper
For Serving
- 2 cups gluten-free, no-sugar-added marinara sauce
- 4 medium zucchini, spiralized
- 1 tbsp olive oil
- Fresh basil, for serving
Instructions
- Make the meatballs. Preheat the oven to 400°F. Combine the ground turkey, egg, almond flour, oregano, garlic powder, onion powder, salt, and pepper. Mix just until combined; don’t overwork the meat.
- Shape and bake. Form the mixture into 16 meatballs and place on a parchment-lined baking sheet. Bake for 18–20 minutes, or until the centers reach 165°F.
- Warm the sauce. While the meatballs cook, warm the marinara in a large skillet over medium-low heat. Add the cooked meatballs and simmer gently for about 5 minutes.
- Cook the zucchini noodles. Heat the olive oil in a separate skillet over medium-high heat. Add the zucchini noodles and cook for just 1–2 minutes, tossing frequently. Season lightly with salt and pepper. Don’t overcook them or they’ll release too much water.
- Assemble. Divide the zucchini noodles among four containers and top with meatballs and marinara. Add fresh basil after reheating or just before serving.
Meal Prep Tips
Zucchini noodles release water as they sit, so keeping them separate from the sauce gives you a much better texture.
For meal prep, store the meatballs and marinara together and the zucchini noodles separately when possible. Reheat the meatballs and sauce thoroughly, then briefly warm the zucchini noodles.
Gluten-free note: Check the marinara label to make sure it is gluten-free if you’re avoiding gluten strictly.
5. Chimichurri Steak & Roasted Veggie Meal Prep
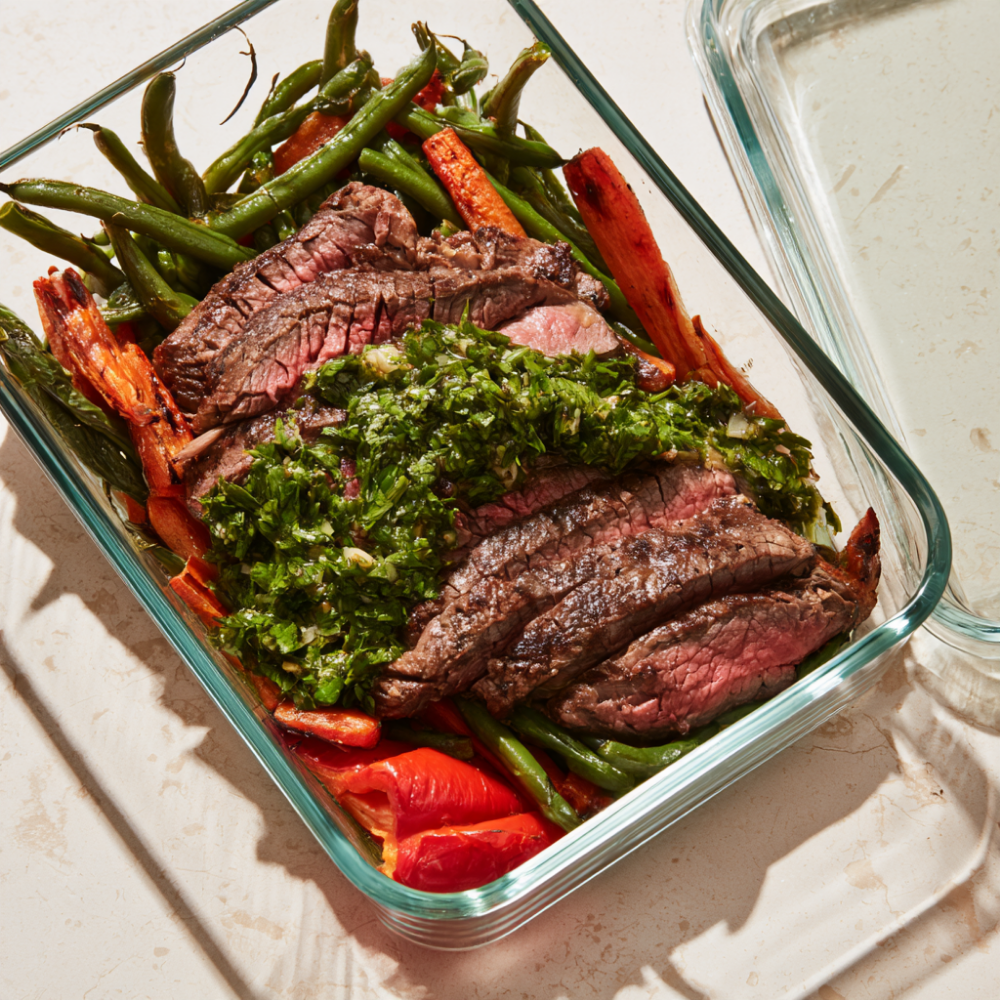
Tender flank steak, caramelized roasted vegetables, and fresh chimichurri make this high-protein meal prep anything but boring. The vegetables roast while the steak cooks, and the bright herb sauce cuts through the beef’s richness.
Serves: 4
Prep Time: 20 minutes
Cook Time: 25 minutes
Total Time: 45 minutes
Ingredients
For the Steak and Vegetables
- 1½ lbs flank steak
- 2 cups green beans, trimmed
- 2 cups carrots, cut into sticks
- 1 red bell pepper, sliced
- 1½ tbsp olive oil, divided
- 1 tsp kosher salt, divided
- ½ tsp black pepper, divided
For the Chimichurri
- 1 cup fresh flat-leaf parsley, finely chopped
- ½ cup fresh cilantro, finely chopped
- 3 cloves garlic, finely minced
- ¼ cup extra-virgin olive oil
- 2 tbsp red wine vinegar
- 1 tsp dried oregano
- ¼ tsp red pepper flakes
- ¼ tsp salt, plus more to taste
Instructions
- Roast the vegetables. Preheat the oven to 425°F. Toss the green beans, carrots, and bell pepper with 1 tbsp olive oil, ½ tsp salt, and ¼ tsp pepper. Spread in a single layer on a large sheet pan and roast for 20–25 minutes, tossing once halfway through.
- Cook the steak. Pat the flank steak dry and season both sides with the remaining salt, pepper, and olive oil. Grill or pan-sear over high heat for about 4–5 minutes per side for medium-rare, depending on thickness. Cook to your preferred doneness.
- Rest before slicing. Transfer the steak to a cutting board and rest for 5–10 minutes. Slice thinly against the grain.
- Make the chimichurri. Finely chop the parsley, cilantro, and garlic. Stir together with the olive oil, red wine vinegar, oregano, red pepper flakes, and salt. Taste and adjust the seasoning.
- Assemble. Divide the roasted vegetables and sliced steak among four glass meal-prep containers. Keep the chimichurri in small leakproof containers or separate compartments.
Meal Prep Tips
Keep the chimichurri separate until serving. It stays fresher that way and prevents the vegetables from becoming oily.
For the best steak texture, slice the beef before storing but don’t overcook it initially. Reheat gently or enjoy it cold over the vegetables.
6. Ground Turkey Taco Salad
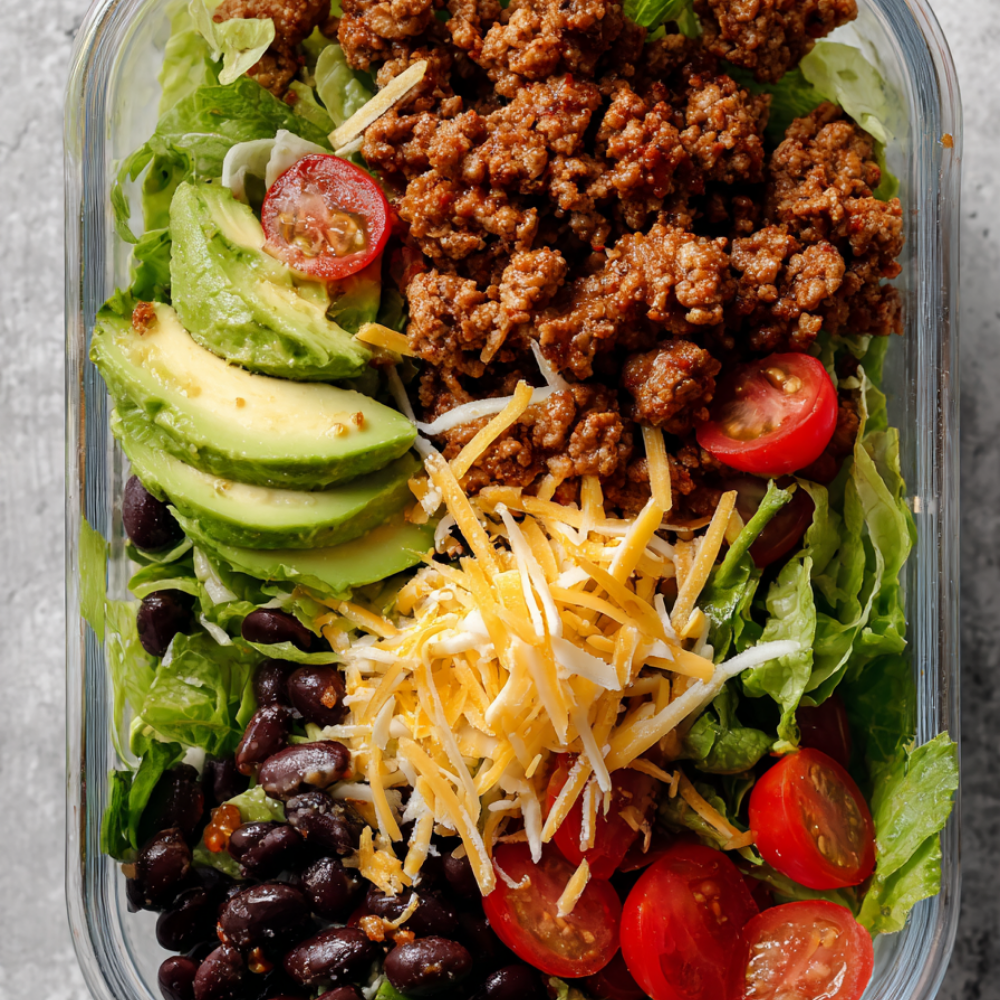
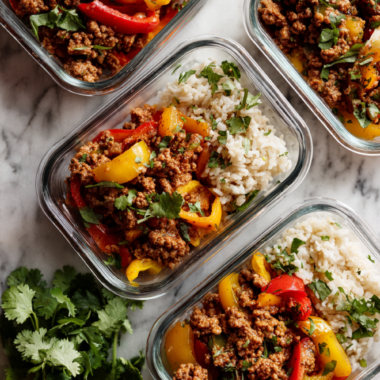
This ground turkey taco salad is colorful, filling, and easy to pack in a glass meal-prep container. Seasoned turkey, crisp romaine, black beans, juicy tomatoes, avocado, and a squeeze of lime give you all the flavors of a taco without the tortilla.
Serves: 4
Prep Time: 15 minutes
Cook Time: 10 minutes
Total Time: 25 minutes
Ingredients
- 1 lb ground turkey
- 1 tbsp gluten-free taco seasoning
- ½ cup water
- 6 cups chopped romaine lettuce
- 1 cup black beans, rinsed and drained
- 1 cup cherry tomatoes, halved
- ½ cup dairy-free cheddar-style shreds, optional
- 1 avocado, diced or sliced
- ½ cup salsa, for serving
- 1 lime, cut into 4 wedges
Instructions
- Cook the turkey. Heat a large skillet over medium-high heat. Add the ground turkey and cook for 5–7 minutes, breaking it into small crumbles, until cooked through.
- Season it. Stir in the taco seasoning and water. Simmer for about 3–5 minutes, stirring occasionally, until most of the liquid has evaporated and the turkey is well coated.
- Cool completely. Transfer the turkey to a plate or shallow bowl and let it cool completely before assembling the salads. Packing hot turkey directly against the lettuce will cause it to wilt.
- Assemble the containers. Divide the romaine among four glass containers. Add the cooled turkey, black beans, tomatoes, and dairy-free cheese in separate sections.
- Add avocado last. Add avocado just before serving when possible. Pack salsa separately and include a lime wedge with each container.
Meal Prep Tips
For the crispest salad, keep the salsa separate and add the avocado the morning you plan to eat it.
If you need to prepare everything ahead, toss the avocado with a little lime juice to slow browning. Store the containers in the fridge and eat within 3–4 days.
Gluten-free note: Use taco seasoning and salsa labeled gluten-free if you’re strictly avoiding gluten.
7. Slow Cooker Beef Ragu with Spaghetti Squash
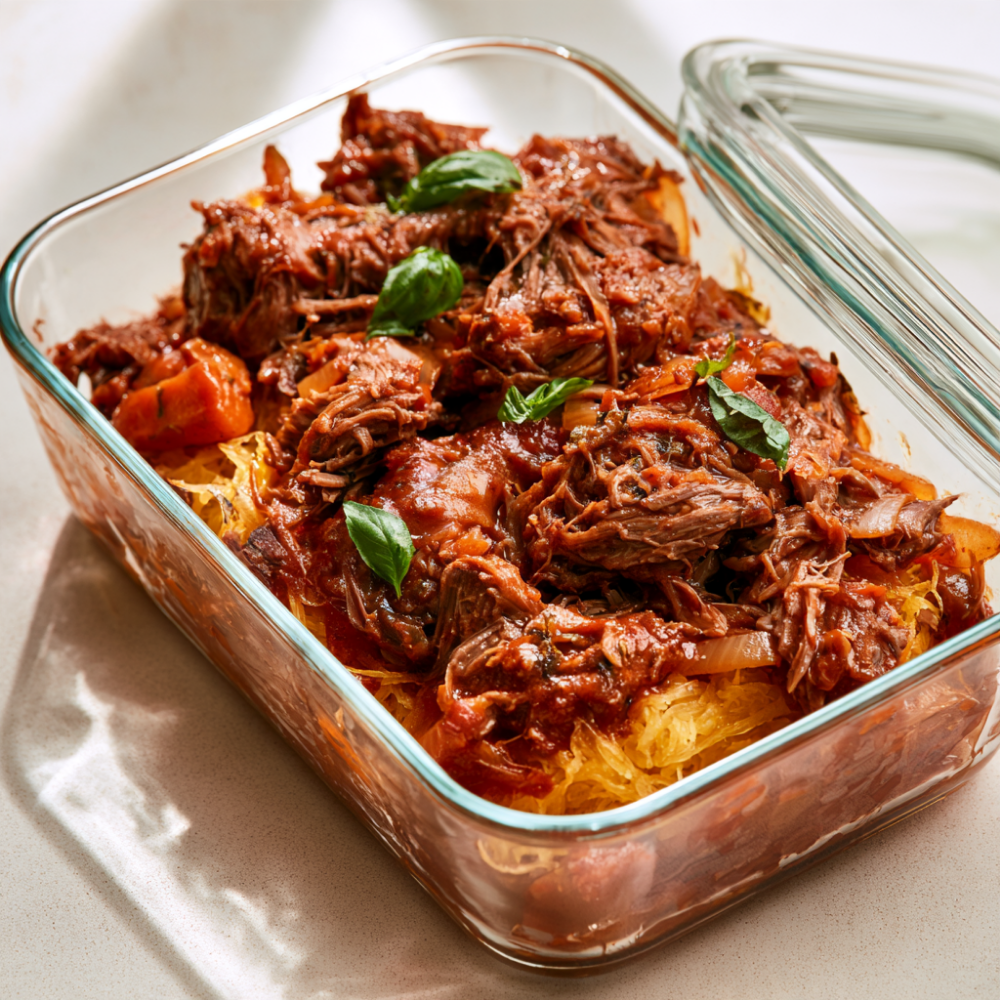
This slow cooker beef ragu turns an inexpensive chuck roast into tender, shreddable beef in a rich tomato sauce. Serve it over roasted spaghetti squash for a naturally gluten-free, dairy-free meal, or use your favorite gluten-free pasta for something more traditional.
Serves: 6
Prep Time: 15 minutes
Cook Time: 8 hours
Total Time: About 8 hours 15 minutes
Ingredients
- 2 lbs boneless beef chuck roast
- 1 can (28 oz) crushed tomatoes
- 1 medium yellow onion, diced
- 3 cloves garlic, minced
- 2 medium carrots, finely diced
- 1 tbsp Italian seasoning
- 1 cup low-sodium beef broth
- 1 tbsp balsamic vinegar
- 1 tsp kosher salt
- ½ tsp black pepper
- 2 medium spaghetti squash, for serving
- Fresh parsley or basil, optional
Instructions
- Build the ragu. Place the chuck roast in a 6-quart slow cooker. Add the crushed tomatoes, onion, garlic, carrots, Italian seasoning, beef broth, balsamic vinegar, salt, and pepper.
- Cook slowly. Cover and cook on LOW for about 8 hours, or until the beef is very tender and pulls apart easily with a fork. You can cook it on HIGH for about 4–5 hours, but LOW is preferred for the best texture.
- Shred the beef. Transfer the beef to a large bowl and shred it with two forks. Remove any large pieces of fat, then return the shredded beef to the sauce.
- Prepare the spaghetti squash. Roast halved spaghetti squash cut-side down at 425°F for about 35–45 minutes, until tender. Let cool slightly, then scrape the flesh into strands with a fork.
- Assemble. Divide the spaghetti squash among six containers and top with the beef ragu. Garnish with fresh parsley or basil if desired.
Meal Prep Tips
Store the spaghetti squash and ragu separately to prevent the squash from absorbing too much sauce.
For the best texture, reheat the ragu thoroughly and warm the squash separately before combining.
The ragu can be refrigerated for 3–4 days or frozen for up to 3 months. Thaw frozen ragu in the refrigerator before reheating.
8. Salmon & Sweet Potato Bowls
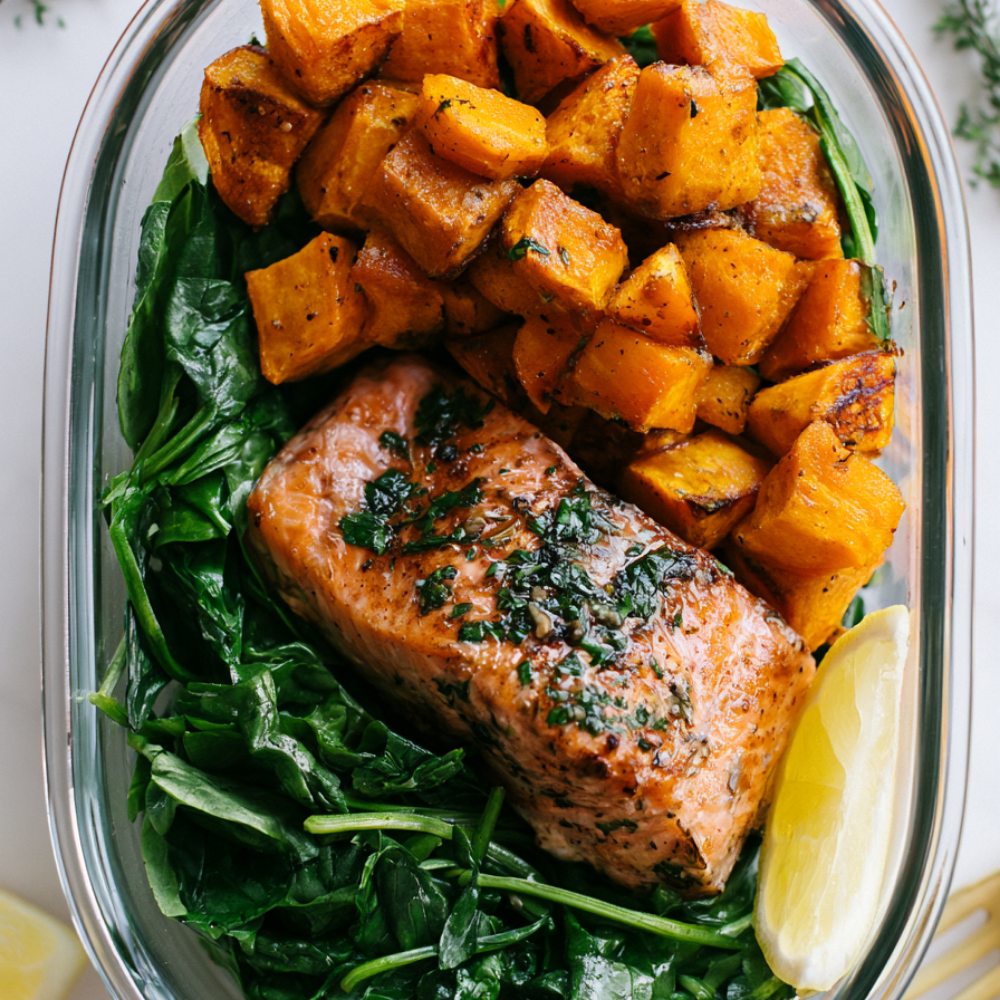
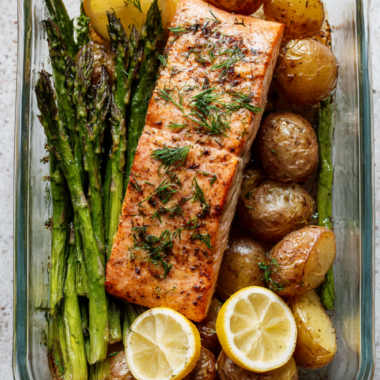
Roasted salmon, caramelized sweet potatoes, and fresh spinach make a simple gluten-free meal prep bowl that feels nourishing without requiring a complicated recipe. A squeeze of lemon and fresh herbs brighten the rich salmon and sweet potatoes.
Serves: 4
Prep Time: 15 minutes
Cook Time: 25–30 minutes
Total Time: About 40–45 minutes
Ingredients
- 4 salmon fillets, about 5–6 oz each
- 2 medium sweet potatoes, peeled and cut into 1-inch cubes
- 4 cups fresh baby spinach
- 2 tbsp olive oil, divided
- 1 tsp garlic powder
- ½ tsp smoked paprika
- ½ tsp kosher salt
- ¼ tsp black pepper
- 1 lemon, cut into wedges
- 2 tbsp chopped fresh dill or parsley
Instructions
- Roast the sweet potatoes. Preheat the oven to 425°F. Toss the sweet potato cubes with 1 tbsp olive oil, garlic powder, smoked paprika, ¼ tsp salt, and pepper. Spread them on a sheet pan and roast for 20 minutes.
- Add the salmon. Push the sweet potatoes to one side of the pan. Pat the salmon dry and brush with the remaining olive oil. Season with the remaining salt and a little black pepper. Place the salmon in the pan.
- Finish roasting. Return the pan to the oven and roast for another 10–14 minutes, depending on fillet thickness, until the salmon reaches 145°F or flakes easily with a fork.
- Cool before packing. Let the salmon and sweet potatoes cool to room temperature before assembling the containers. This prevents excess condensation from making the spinach soggy.
- Assemble. Divide the fresh spinach among four glass meal-prep containers. Add the cooled sweet potatoes and one salmon fillet to each. Sprinkle with fresh dill or parsley and add a lemon wedge.
Meal Prep Tips
If you plan to eat the bowl cold, keep everything together as written.
If you plan to reheat it, pack the salmon and sweet potatoes separately from the spinach. Gently reheat the salmon and sweet potatoes, then serve them over the fresh spinach.
For the best quality, use cooked salmon within 3 days.
Easy Flavor Upgrade
For more flavor without much extra work, whisk together 1 tablespoon olive oil, 1 tablespoon fresh lemon juice, 1 teaspoon Dijon mustard, and a pinch of salt. Pack the dressing separately and drizzle it over the bowl just before eating.
This small addition makes a noticeable difference, especially after the bowl has been refrigerated.
Tips for Better Gluten-Free Meal Prep
Use gluten-free sauces. Coconut aminos, tamari, and gluten-free soy sauce are your friends. Always check labels on taco seasoning, buffalo sauce, marinara, and broth.
Keep dairy-free. Skip cheese and cream — or use dairy-free shreds. Coconut yogurt, olive oil, and avocado add creaminess without dairy.
Slice steak against the grain. This keeps it tender when reheated.
Cool before sealing. Let food cool completely before closing containers to prevent sogginess and wilted greens.
Portion into glass containers. Glass reheats evenly, doesn’t stain, and looks great in photos.
For a gluten-free renal diet: Use low-sodium broth and sauces, limit tomatoes, sweet potatoes, beans, and avocado, and choose cauliflower rice or zucchini noodles. Check with your doctor or dietitian for personalized guidance.
Storage and Reheating
Store gluten-free meal prep containers in the refrigerator for 3–4 days. Freeze for up to 3 months. Thaw overnight in the refrigerator, then reheat in the microwave for 60–90 seconds or in a 350°F oven for 10–15 minutes. Keep sauces, lettuce, spinach, and avocado separate until serving.
Frequently Asked Questions
Is gluten-free meal prep healthy?
Yes — gluten-free meal prep can be high in protein, fiber, and nutrients when built around vegetables, lean proteins, and whole grains like quinoa and rice.
Are these recipes dairy-free too?
Yes. Every recipe here is gluten-free and dairy-free as written. Always check labels on sauces, broths, and seasonings, and use dairy-free shreds if you want the taco salad to look like the classic version.
Can I use chicken instead of beef?
Yes. The gluten-free teriyaki sauce in recipe 1 works beautifully with chicken, beef, or tofu if you’re looking for gluten-free chicken dishes or gluten-free, dairy-free chicken recipes. It’s an easy gluten-free teriyaki recipe, and you can even make it in the crockpot.
What are the best proteins for gluten-free meal prep?
Chicken, turkey, beef, salmon, eggs, tofu, and chickpeas are all excellent choices.
Are these high-protein gluten-free meals?
Most provide 25–35g of protein per serving, depending on the protein and portion size.
Can I make these recipes renal-diet friendly?
Yes, with adjustments. Use low-sodium ingredients, limit high-potassium foods like sweet potatoes, tomatoes, beans, and avocado, and choose cauliflower rice or zucchini noodles. Consult your healthcare provider.
How long does gluten-free meal prep last?
About 3–4 days in the fridge and up to 3 months in the freezer.
Can I prep these on Sunday for the whole week?
Yes. Cook the proteins and bases, store them separately, and assemble bowls each day or portion everything into containers.
Conclusion
Gluten-free meal prep can be healthy, dairy-free, and genuinely delicious. With these 8 recipes, you get high-protein meals that work for easy gluten-free lunch ideas, gluten-free lunch ideas for work, healthy gluten-free meals, and quick gluten-free dinners. From gluten-free teriyaki chicken to quinoa tabbouleh boxes, turkey taco salad, and a five-ingredient salmon and sweet potato bowl, there’s something here for every craving.
Cook once, portion smart, keep sauces separate, and you’ll have a week of healthy meals ready to grab — no gluten, no dairy, and no boring lunches.