You want the candy bar. The rich, fudgy, chocolate-and-peanut-butter combination that hits every craving at once. You just don’t want to blow through a day’s worth of sugar to get it, and you’d rather it did something for you besides taste good.
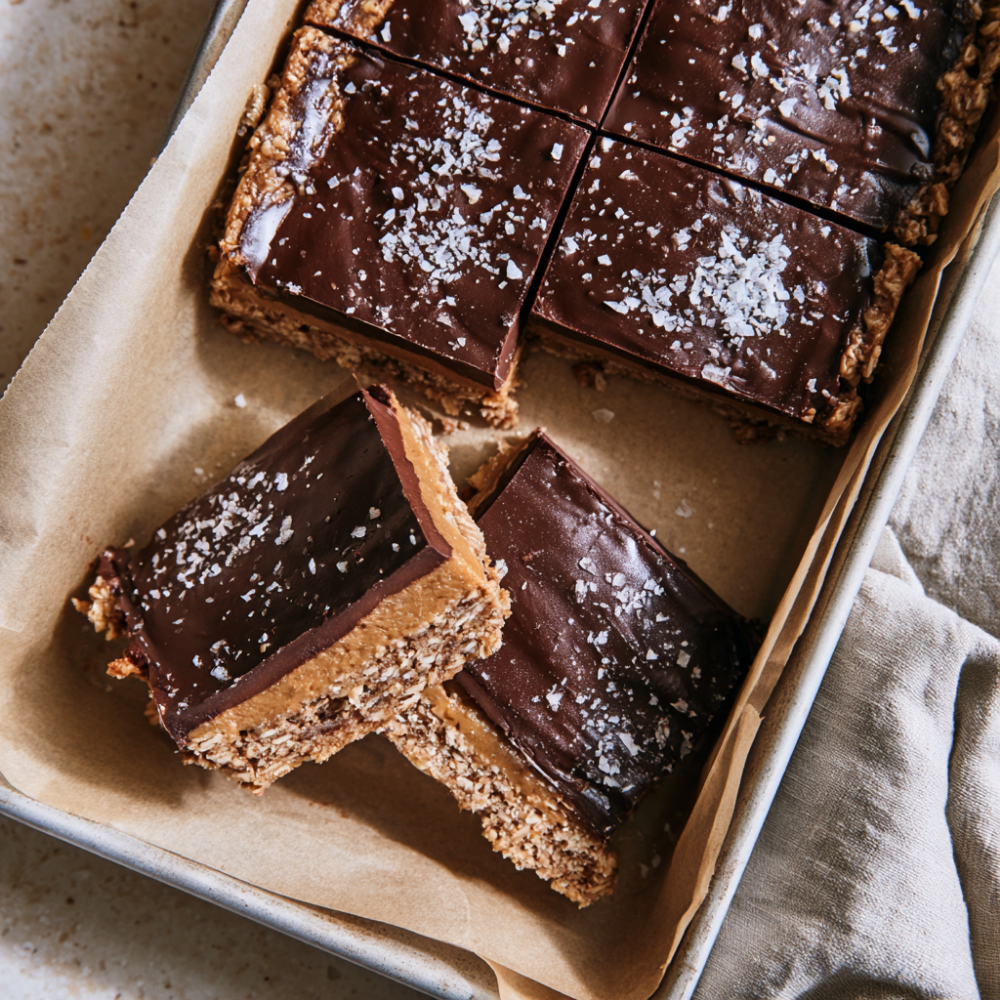
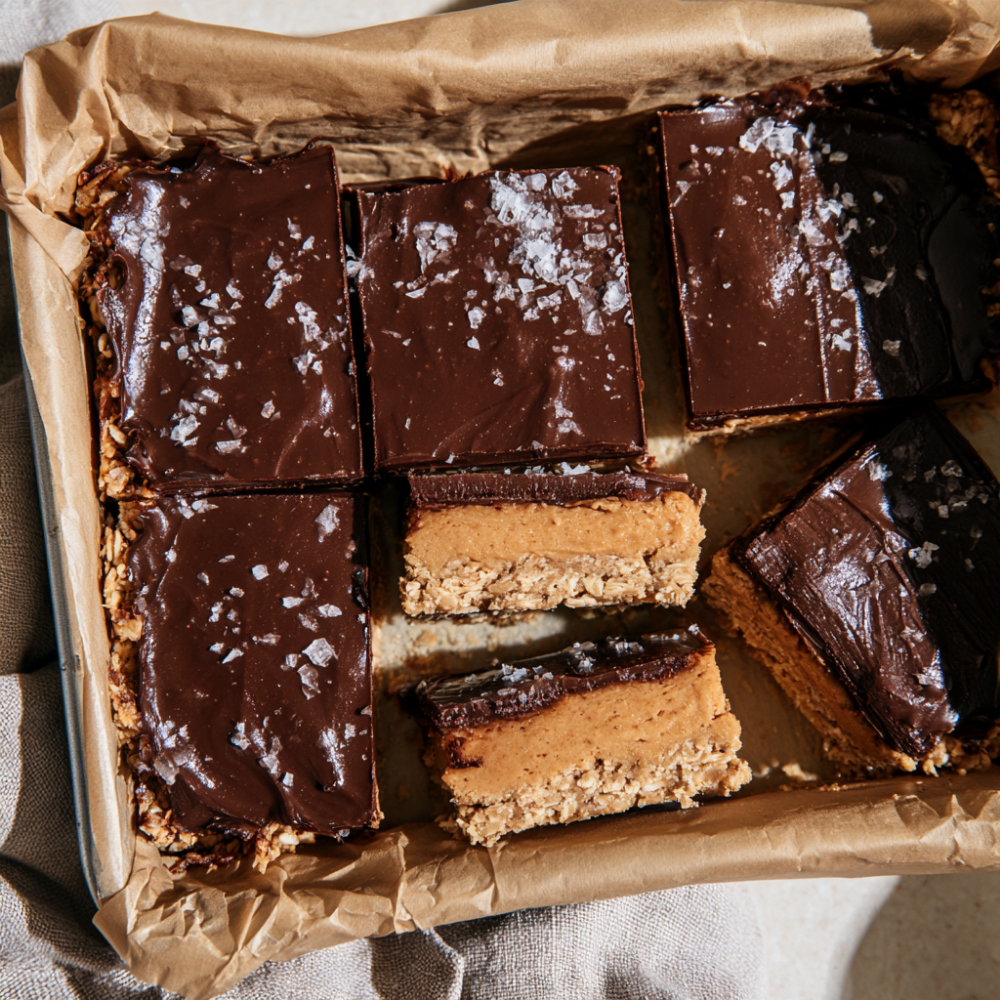
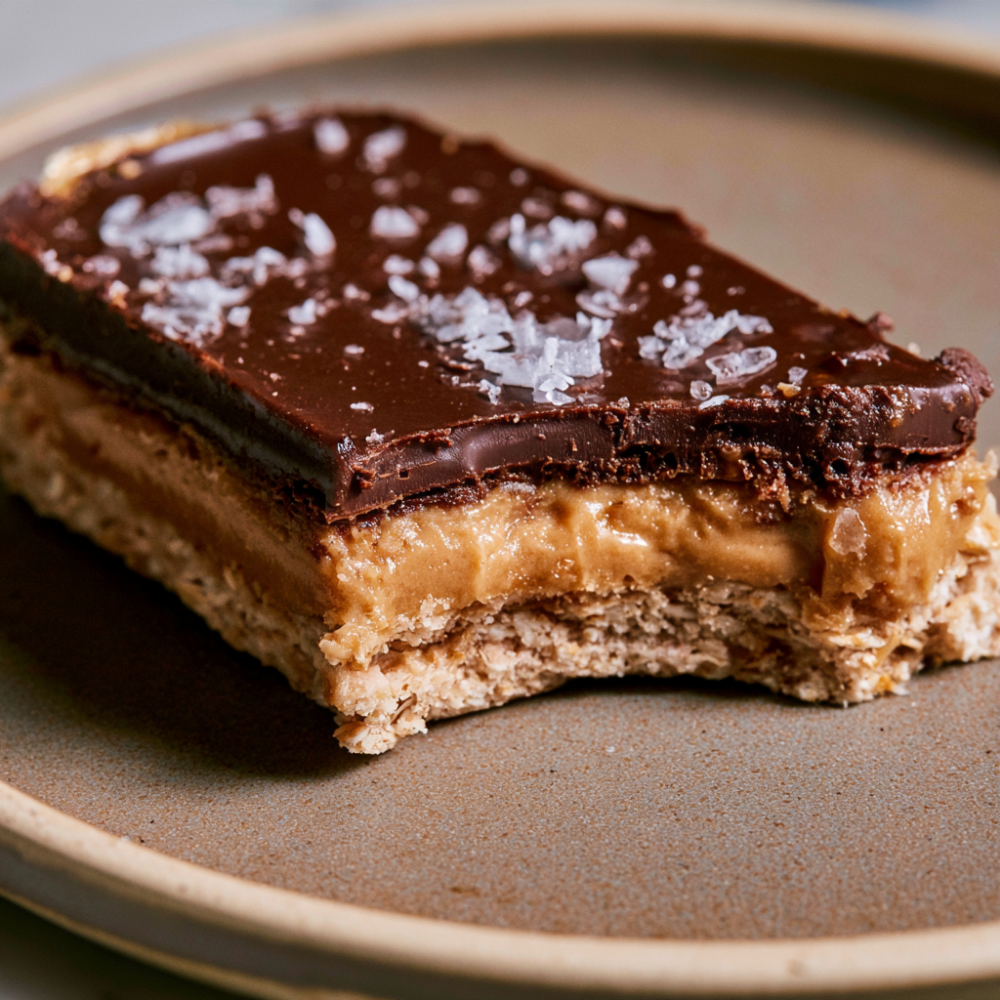
These peanut butter chocolate bars are the answer. Three layers — a chewy oat-and-peanut-butter base, a creamy peanut butter protein filling, and a dark chocolate shell that snaps when you bite into it. About 14–16 grams of protein per bar, and the whole thing takes 15 minutes to prep with no oven.
The trick is the protein powder in both the base and the filling. It adds real protein, but it also does something structural — it thickens the peanut butter filling so it sets firm instead of oozing, and it gives the oat base enough body to hold together when you slice. Get the ratio right, and these taste like a Reese’s cup crossed with a really good granola bar.
The best part is that they’re freezer-friendly. Make a batch on Sunday, wrap the bars individually, and you’ve got grab-and-go snacks for a month. Pull one out in the morning, and it’s thawed by the time you’re hungry.
Two things decide whether these turn out fudgy or crumbly, and neither is optional.
Press the base firmly into the pan. Loose crumbs don’t hold together when you slice. Use the bottom of a measuring cup or the back of a spatula to pack it down hard. You want it compact, not fluffy.
Chill for at least 2 hours before slicing, then rest 5–10 minutes at room temperature. The bars need time to set so the layers hold together. The brief rest before cutting softens the chocolate just enough to prevent cracking.
Everything else is forgiving and flexible, and it takes about 15 minutes of actual work.
Why This Recipe Works
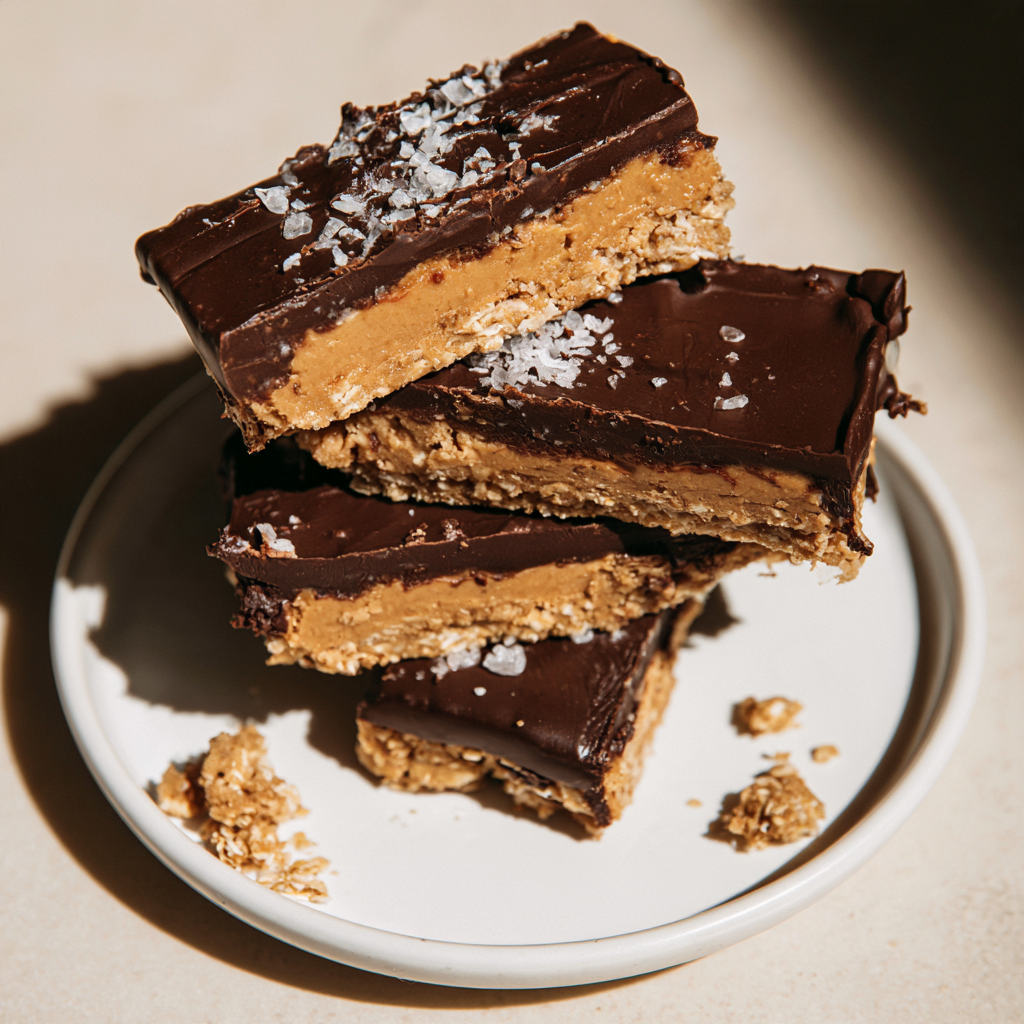
Three layers, three textures. The oat base is chewy. The peanut butter filling is creamy and fudgy. The chocolate shell is crisp and snappy. That contrast is what makes a bar taste like a candy bar instead of a health food bar.
Protein powder in the base and filling adds real protein and structure. It’s not just for macros. Protein powder thickens the peanut butter filling so it sets firm, and it gives the oat base enough body to hold together when you slice it.
Oat flour holds everything together. Blended rolled oats create a soft, chewy base that mimics the texture of a soft-baked cookie. Oat flour also adds fiber and slow-release carbs, which makes these bars satisfying.
Natural peanut butter is the right choice. It’s runnier and less sweet than conventional peanut butter (like Jif or Skippy), so it mixes into the base more easily and gives the filling a looser, fudgier texture. Stir it well before measuring.
Coconut oil in the chocolate shell helps it set firm and snap. Without it, the chocolate stays soft, and the bars are messy to eat. With it, you get that clean snap when you bite through.
Flaky sea salt on top makes everything taste sweeter. It’s the same trick that makes salted caramel taste like more than caramel. Don’t skip it.
The texture checkpoints are built in. The recipe tells you exactly what the base and filling should feel like at each stage. That’s what makes it reliable with any protein powder brand.
They’re a genuine no-bake recipe. No oven, no stovetop, no baking dish that needs to cool. Mix, press, chill, slice. That’s the whole thing.
They’re freezer-friendly. Wrap individual bars, freeze for up to 3 months, and pull one out whenever you need a snack. They thaw in 10–15 minutes.
Peanut Butter Chocolate Bars
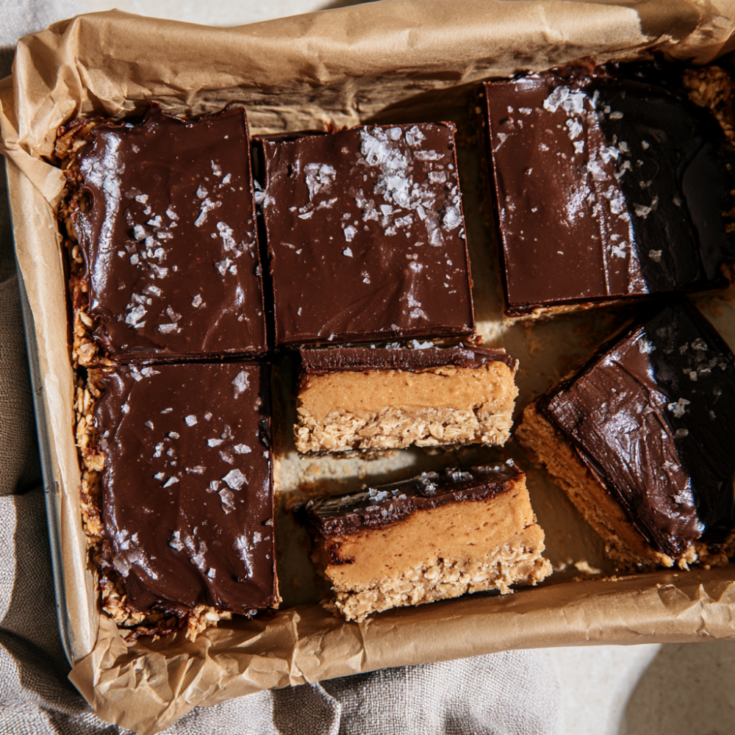
These no-bake peanut butter chocolate bars have three satisfying layers: a chewy oat-and-peanut-butter base, a creamy peanut butter protein filling, and a smooth dark chocolate topping finished with flaky sea salt.
They're rich enough to feel like a treat but substantial enough to work as a make-ahead protein snack.
Ingredients
For the Oat Base:
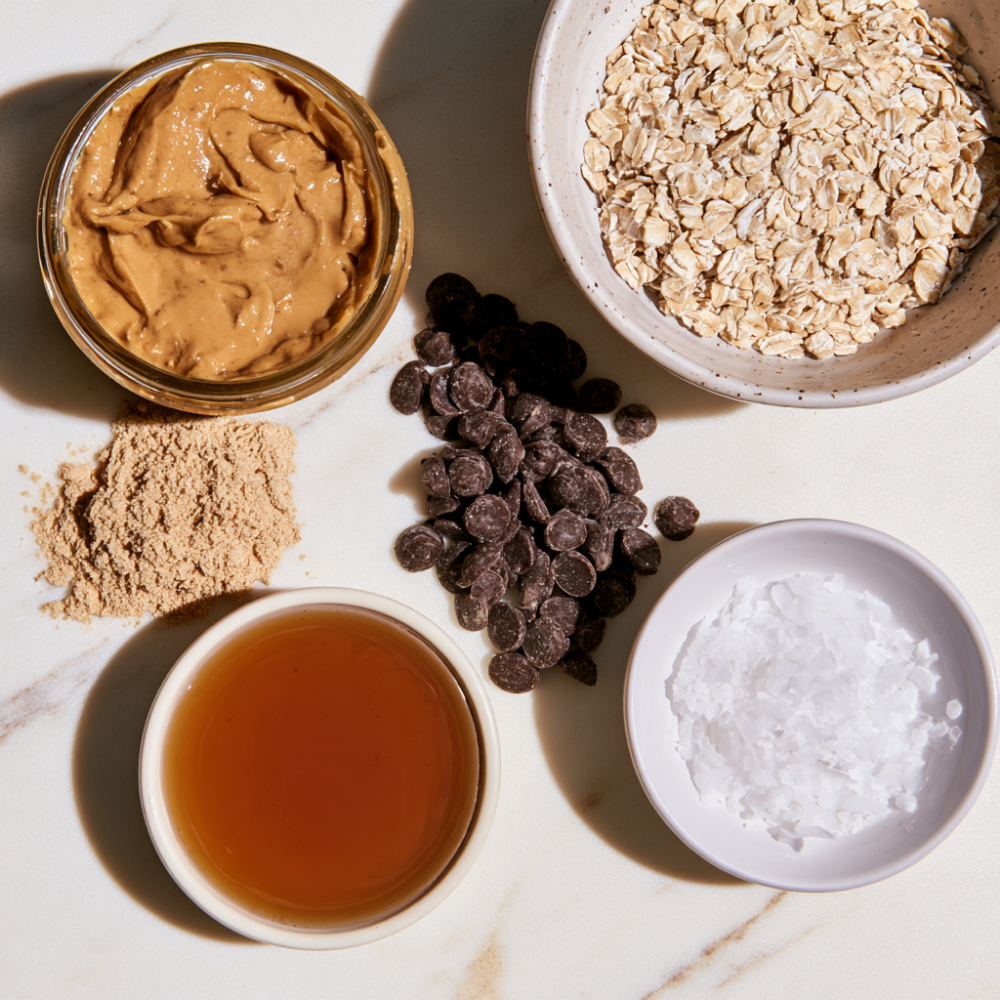
- 1½ cups rolled oats, blended into a coarse flour (or 1½ cups oat flour)
- 1 cup natural creamy peanut butter, very well stirred
- ½ cup vanilla protein powder
- ¼ cup pure maple syrup
- 1 tsp vanilla extract
- ½ tsp kosher salt
- 1–3 tbsp unsweetened almond milk or milk, only as needed
For the Peanut Butter Protein Filling:
- ¾ cup natural creamy peanut butter, very well stirred
- ¼ cup vanilla protein powder
- 1 tbsp coconut oil, melted
- 1½ tbsp pure maple syrup
- ¼ tsp kosher salt
- 1–2 tsp unsweetened almond milk or warm water, only if needed
For the Chocolate Topping:
- 1¼ cups dark chocolate chips (or finely chopped dark chocolate)
- 1 tbsp coconut oil
- Flaky sea salt, for finishing
Instructions
1. Prepare the oat flour. If using rolled oats, place them in a food processor and blend for 30–45 seconds, until they resemble a coarse flour. Stop while some fine and slightly coarse pieces remain — you don't want the oats turned into a completely powdery flour.
2. Make the oat base. In a large bowl, combine the oat flour, peanut butter, protein powder, maple syrup, vanilla, and salt. Stir thoroughly until the mixture forms a thick, cohesive dough.
Test the mixture by squeezing a small amount between your fingers. It should hold together firmly without feeling wet or greasy. If the mixture is too crumbly to hold together, add milk 1 tablespoon at a time, mixing completely after each addition. Stop as soon as the mixture comes together and presses easily. Depending on the peanut butter and protein powder, you may need only 1 tablespoon or none. Don't add extra milk just to soften the mixture.
3. Press the base into the pan. Line an 8x8-inch baking pan with parchment paper, leaving enough overhang on two sides to lift the finished bars out. Transfer the oat mixture to the pan.
Press it firmly and evenly into the bottom of the pan using the bottom of a measuring cup, a flat-bottomed glass, or the back of a spatula. Take extra care to compact the corners and edges. A firmly packed base helps bars hold together cleanly.
4. Make the peanut butter protein filling. In a medium bowl, stir together the peanut butter, protein powder, melted coconut oil, maple syrup, and salt. Mix until completely smooth.
The filling should have the consistency of a thick frosting: soft enough to spread but firm enough to hold its shape. If it is too stiff to spread smoothly, add 1 teaspoon of almond milk or warm water and mix thoroughly. Add a second teaspoon only if needed.
5. Add the peanut butter layer. Spread the peanut butter filling evenly over the oat base. Use a small offset spatula, silicone spatula, or the back of a spoon to smooth the surface. Spread the filling all the way to the edges so each bar has an even layer. Place the pan in the freezer for 15 minutes while you prepare the chocolate topping.
6. Melt the chocolate. Place the chocolate and coconut oil in a microwave-safe bowl. Microwave in 20-second intervals, stirring very well after each interval. Continue until the chocolate is almost completely melted, then stir until completely smooth.
Avoid overheating the chocolate. Gentle heating and frequent stirring produce a smoother topping. If the chocolate seizes, stir in a teaspoon of coconut oil to smooth it out.
7. Add the chocolate topping. Remove the pan from the freezer. Pour the melted chocolate over the peanut butter layer and spread it evenly to the edges. Gently tap the pan against the counter once or twice to help level the chocolate and release any air bubbles.
8. Finish with flaky sea salt. Immediately sprinkle a light pinch of flaky sea salt over the chocolate while it is still melted. The salt is optional, but highly recommended. It balances the sweetness and makes the peanut butter and dark chocolate flavors stand out.
9. Chill. Refrigerate the bars for at least 2 hours, or until the chocolate and peanut butter layers are completely firm. For the cleanest layers and easiest slicing, chill for about 4 hours.
10. Slice. Lift the chilled bars from the pan using the parchment paper overhang and place them on a cutting board. Let them sit at room temperature for about 5–10 minutes before cutting. This allows the chocolate topping to soften slightly and reduces cracking.
Use a sharp knife to cut the slab into 12 bars in a 3-by-4 grid. For especially clean cuts, run the knife under hot water, dry it completely, then make a cut. Wipe the knife clean and repeat between cuts as needed.
11. Serve. These bars are delicious straight from the refrigerator, but the texture is especially good after sitting at room temperature for about 5–10 minutes. The base softens slightly and gets chewier, while the peanut butter layer becomes creamier.
Make-ahead: These bars are designed to be made ahead. Store them in an airtight container in the refrigerator for up to 1 week. For the best texture, keep the bars chilled and let each bar sit at room temperature for a few minutes before serving.
Freezer: Freeze the bars in a single layer until firm. Once frozen, transfer them to a freezer-safe container or bag, placing parchment paper between layers if stacking them. Freeze for up to 3 months. Thaw individual bars at room temperature for about 10–15 minutes, or enjoy them partially frozen for a firmer, chewier texture.
Notes
Protein per Bar: About 14–16g
Nutrition note: Protein and calories vary by protein powder, peanut butter, oats, and chocolate brands. The 14–16g protein estimate is based on common protein powder brands, but the exact amount can vary significantly between products. Calculate with your specific ingredient labels for the most accurate numbers. Estimated per bar: ~280 calories, 14–16g protein, ~22 g carbs, ~18 g fat.
Tips for the Best Peanut Butter Chocolate Bars
Use natural peanut butter, stirred well. Natural peanut butter is runnier and less sweet than conventional peanut butter. It mixes more easily into the base and gives the filling a looser, fudgier texture. If you use conventional peanut butter, the bars will be sweeter and slightly firmer.
Blend the oats into a coarse flour, not a fine powder. You want some texture left for a chewy base. A fine powder makes the bars dense and pasty.
Add milk one tablespoon at a time. Protein powders absorb dramatically different amounts of liquid. The recipe gives you a texture target — the base should hold together firmly when squeezed. If it’s crumbly, add milk a tablespoon at a time. If it’s too wet, add an extra tablespoon of oat flour.
Press the base firmly into the pan. This is the single most important step for bars that hold together. Use the bottom of a measuring cup or the back of a spatula and press hard. Loose crumbs crumble when sliced.
Treat the filling like thick frosting. The filling should be soft enough to spread but firm enough to hold its shape. If it’s too stiff, add a teaspoon of milk. If it’s too loose, add another tablespoon of protein powder.
Freeze the filling layer for 15 minutes before adding chocolate. This sets the peanut butter layer so the chocolate goes on smoothly and the layers stay distinct.
Don’t overheat the chocolate. Chocolate seizes and turns grainy if it gets too hot. Microwave in 20-second intervals, stirring between each. The residual heat will melt the last few chips.
Tap the pan to release air bubbles. A few gentle taps on the counter level the chocolate and prevent air pockets in the finished bars.
Add flaky sea salt. It’s the difference between a good bar and a great one. The salt makes the chocolate taste sweeter and more complex.
Chill for at least 2 hours, preferably 4. The bars need time to set so the layers hold together when you slice them.
Let the bars rest 5–10 minutes at room temperature before cutting. This is the single most useful slicing improvement. The chocolate softens just enough to prevent cracking, and the bars cut cleanly.
Use a warm knife for clean cuts. Run the knife under hot water, dry it, and wipe it between cuts. This prevents the chocolate from cracking and the peanut butter from smearing.
Store in the refrigerator, not at room temperature. The coconut oil in the chocolate shell softens at room temperature. The bars hold their shape best when cold.
Eat them straight from the freezer for a firmer texture. They don’t freeze solid — the peanut butter keeps them chewy. It’s a genuinely good texture.
Troubleshooting
The base is too crumbly and won’t hold together.
Add milk one tablespoon at a time, mixing completely after each addition. Stop as soon as the mixture holds together when squeezed. Different protein powders and peanut butters absorb very different amounts of liquid.
The base is too wet or gummy.
Add an extra tablespoon of oat flour or protein powder. If it’s still too wet, refrigerate the mixture for 15 minutes before pressing it into the pan.
The filling is too stiff to spread.
Add 1 teaspoon of almond milk or warm water and mix thoroughly. Add a second teaspoon only if needed.
The filling is too loose and won’t set.
Add an extra tablespoon of protein powder. If it’s still too loose, freeze the layer for 20 minutes instead of 15.
The chocolate seized and turned grainy.
It got too hot. Stir in a teaspoon of coconut oil to smooth it out. Next time, microwave in shorter intervals.
The bars cracked when sliced.
The chocolate was too cold. Let the bars rest at room temperature for 5–10 minutes before cutting. Run the knife under hot water and dry it between cuts.
The layers separated when sliced.
The filling layer wasn’t firm enough before adding the chocolate. Freeze it for a full 15 minutes before adding the chocolate.
Easy Variations
Chocolate Peanut Butter Oatmeal Bars. Add ½ cup of mini chocolate chips to the oat base. About 15–17g protein per bar.
Reese’s Peanut Butter Bars. Use milk chocolate chips instead of dark chocolate and add ½ cup of chopped Reese’s peanut butter cups to the peanut butter filling. About 15–17g protein per bar.
Peanut Butter Cookie Bars. Skip the chocolate shell entirely and press the oat base into a thicker single layer. Cut into 12 squares. About 12–14g protein per bar.
Snickers Bars Recipe (Inspired). Add a layer of date caramel (blended dates + a splash of water + a pinch of salt) between the oat base and the peanut butter filling. About 14–16g protein per bar.
Peanut Butter Chocolate Chip Cookie Bars. Add ½ cup of mini chocolate chips to the oat base and skip the chocolate shell. About 14–16g protein per bar.
Healthy No Bake Bars (Vegan). Use dairy-free protein powder, dairy-free chocolate chips, and maple syrup instead of honey. About 13–15g protein per bar.
Storage and Food Safety
Refrigerator: Store in an airtight container in the refrigerator for up to 1 week. Separate layers with parchment paper if stacking.
Freezer: Wrap individual bars tightly in plastic wrap, then transfer to a freezer bag. Freeze for up to 3 months. Thaw at room temperature for 10–15 minutes before eating, or eat straight from the freezer for a firmer texture.
Food safety: Keep the bars refrigerated or frozen. Discard any bars that have been sitting at room temperature for more than 2 hours.
Frequently Asked Questions
How much protein is in each bar?
About 14–16 grams per bar. Most of it comes from the protein powder and peanut butter, with a small contribution from the oats and chocolate. Exact numbers vary significantly by brand.
Why did my bars turn out crumbly?
The base was too dry or wasn’t pressed firmly enough. Add milk one tablespoon at a time until the mixture holds together when squeezed, and use the bottom of a measuring cup to pack the base down hard.
Why did my bars turn out too soft?
They didn’t chill long enough, or the coconut oil in the chocolate shell is softening at room temperature. Chill for at least 2 hours (preferably 4) and store in the refrigerator.
Why did my chocolate seize?
It got too hot in the microwave. Microwave in 20-second intervals, stirring between each. If it’s already seized, stir in a teaspoon of coconut oil to smooth it out.
Can I use conventional peanut butter instead of natural?
Yes, but the bars will be sweeter and slightly firmer. Conventional peanut butter has added sugar and stabilizers. Natural peanut butter is runnier and gives the filling a looser, fudgier texture.
Can I use quick oats instead of rolled oats?
Yes, but the texture will be slightly different. Quick oats are finer and will give you a softer base. Rolled oats blended into a coarse flour give you a chewier, more satisfying texture.
Can I make these without protein powder?
Yes. Skip the protein powder and add an extra ½ cup of oat flour and ¼ cup of peanut butter to the base. About 8–10g protein per bar.
Can I make these vegan?
Yes. Use dairy-free protein powder, dairy-free chocolate chips, and maple syrup. About 13–15g protein per bar.
Can I make these gluten-free?
Yes, if you use certified gluten-free oats and gluten-free protein powder. About 14–16g protein per bar.
Can I use a different nut butter?
Yes. Almond butter, cashew butter, and sunflower seed butter all work. Sunflower seed butter is the best choice if you’re making these nut-free for school lunches.
Can I double this recipe?
Yes. Use a 9×13 pan and double all ingredients. The bars will be slightly thicker and may need an extra 30 minutes in the refrigerator to set.
Can I use a loaf pan instead?
Yes. An 8×4 loaf pan gives you thicker bars. Cut into 6–8 bars instead of 12.
How long do these last in the refrigerator?
Up to 1 week in an airtight container.
How long do these last in the freezer?
Up to 3 months wrapped individually.
Can I eat these straight from the freezer?
Yes. They don’t freeze solid — the peanut butter keeps them chewy. It’s a genuinely good texture.
More High-Protein Dessert and Snack Recipes You’ll Love
- Protein Cheesecake That Gets Its Protein From Cottage Cheese, Not Powder
- 12 Meal Prep Snacks – Easy Grab-and-Go Ideas (10g+ Protein)
- High-Protein Sheet Pan Pancakes
Conclusion
These peanut butter chocolate bars are the no-bake snack that actually delivers on the candy-bar promise.
They have a chewy oat-and-peanut-butter base, a creamy peanut butter protein filling, and a dark chocolate shell that snaps when you bite into it.
About 14–16 grams of protein per bar, and 15 minutes of prep with no oven.
The keys are simple: use natural peanut butter, blend the oats into a coarse flour, press the base firmly into the pan, treat the filling like thick frosting, freeze the filling layer before adding chocolate, don’t overheat the chocolate, add flaky sea salt, chill for at least 2 hours, and let the bars rest 5–10 minutes before slicing.
Do that, and you’ll have bars that taste like a Reese’s cup but work like meal prep.
Make a batch on Sunday, wrap the bars individually, and you’ve got grab-and-go snacks for the week or the freezer for the month.