Plan the picnic. Pack the bag. You drive to the park, spread out the blanket, unzip the cooler, and pull out a soggy sandwich, a pasta salad that got warm in the car, and a fruit container that somehow leaked on everything else. It happens. And it’s the reason most people default to store-bought chips and a cheese plate and call it done.
Here’s the thing: picnic food ideas don’t have to be complicated or risky. The best picnic food is food that’s genuinely designed to travel — sealed, stackable, sturdy, and still good at room temperature. It looks great on a blanket, doesn’t require utensils if you don’t want them, and comes together in under 30 minutes the night before.
These 14 ideas cover the full spread — finger foods, sandwiches, salads, sweets, and one drink worth making. Whether you’re packing for two on a date, feeding a group of friends, or keeping kids happy at the park, there’s something here that works.
Finger Foods & Shareable Bites
Finger foods travel in a single container, require zero utensils, and look good the second you open the lid. These four are the ones worth leading with.
1. Ham, Bacon & Cream Cheese Pinwheels
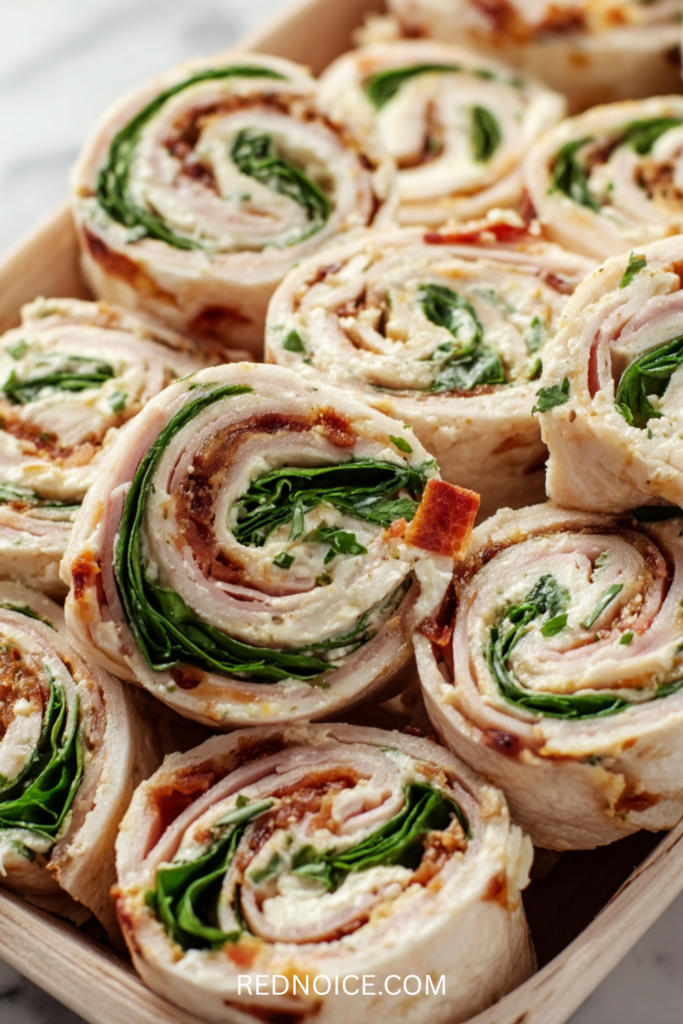
Pinwheels are the picnic food that everyone reaches for first. They’re compact, stack flat in a container, and hold up for hours without going soggy. This version adds crispy bacon to the classic ham, cream cheese, and spinach combination — the smoky saltiness takes it to another level.
The key is to roll the tortilla tightly and refrigerate the whole roll (unsliced) for at least an hour before cutting. This firms everything up so the slices hold their shape cleanly.
Servings: 6 | Prep Time: 15 minutes + 1 hour chill | Cook Time: None
Ingredients:
- 4 large flour tortillas (10-inch)
- 8 oz cream cheese, softened
- 1 tablespoon ranch seasoning (dry packet)
- 8 oz thinly sliced deli ham
- 6 strips of bacon, cooked crispy and crumbled (or chopped into small pieces)
- 2 cups fresh spinach leaves
- ½ cup shredded cheddar cheese
Instructions:
- Cook the bacon until crispy. Drain on paper towels, then crumble or finely chop. Set aside.
- Mix cream cheese and ranch seasoning until smooth and spreadable.
- Spread a thin, even layer over each tortilla, going nearly to the edges.
- Layer ham slices across the cream cheese, then sprinkle the crumbled bacon evenly over the ham.
- Add spinach leaves and shredded cheddar cheese.
- Roll tightly from one end, pressing gently as you go.
- Wrap each roll in plastic wrap and refrigerate for at least 1 hour.
- Slice into 1-inch rounds just before packing. Pack flat in a sealed container.
Note: For extra crunch and a more pronounced bacon flavor, you can double the bacon or use thick-cut bacon. The pinwheels hold up well for several hours in a cooler bag.
2. Spinach & Feta Pinwheels (Gluten-Free Option)

The vegetarian counterpart to the ham version — and honestly just as popular. Spinach, feta, roasted red peppers, and a layer of cream cheese in a tortilla. For a gluten-free version, use gluten-free tortillas; the rest of the recipe is already naturally gluten-free.
These work well alongside the ham pinwheels if you’re feeding a mixed crowd. Make both and stack them in the same container.
Servings: 6 | Prep Time: 15 minutes + 1 hour chill | Cook Time: None
Ingredients:
- 4 large flour tortillas (or gluten-free tortillas)
- 6 oz cream cheese, softened
- ½ cup crumbled feta cheese
- 2 cups fresh baby spinach
- ½ cup jarred roasted red peppers, drained and patted dry
- ¼ teaspoon garlic powder
- ¼ teaspoon black pepper
Instructions:
- Mix cream cheese with garlic powder and black pepper until smooth.
- Spread evenly over each tortilla.
- Crumble feta over the cream cheese layer. Add spinach leaves and sliced roasted red peppers.
- Roll tightly, wrap in plastic wrap, and refrigerate at least 1 hour.
- Slice into rounds before packing. Keep chilled until serving.
3. Grape & Cheese Kabobs
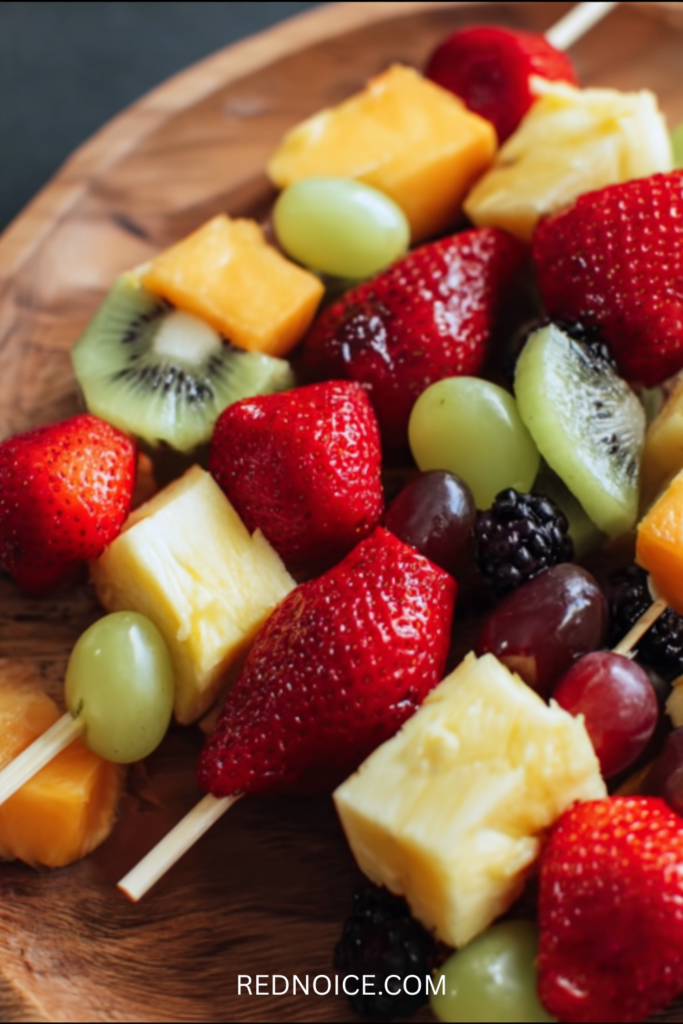
The picnic food that takes five minutes and photographs better than almost anything else on the blanket. Alternate grapes, cubed cheese, and fresh strawberries or melon on small skewers. That’s the entire recipe.
Use a mix of green and red grapes for color. Sharp cheddar and Gouda both work well. Pack the skewers lying flat in a container lined with a paper towel to absorb any moisture.
Servings: 6–8 | Prep Time: 10 minutes | Cook Time: None
Ingredients:
- 2 cups red grapes, rinsed
- 2 cups green grapes, rinsed
- 8 oz sharp cheddar, cubed into ¾-inch pieces
- 8 oz Gouda or Colby Jack, cubed
- 1 cup fresh strawberries, hulled (optional, for color)
- 20–24 small wooden skewers or cocktail picks
Instructions:
- Alternate grapes, cheese cubes, and strawberries on each skewer — 3 to 4 pieces per skewer.
- Arrange in a single layer in a flat, lidded container.
- Refrigerate until ready to pack. These hold well for up to 4 hours out of the fridge.
4. Caprese Skewers with Balsamic Glaze
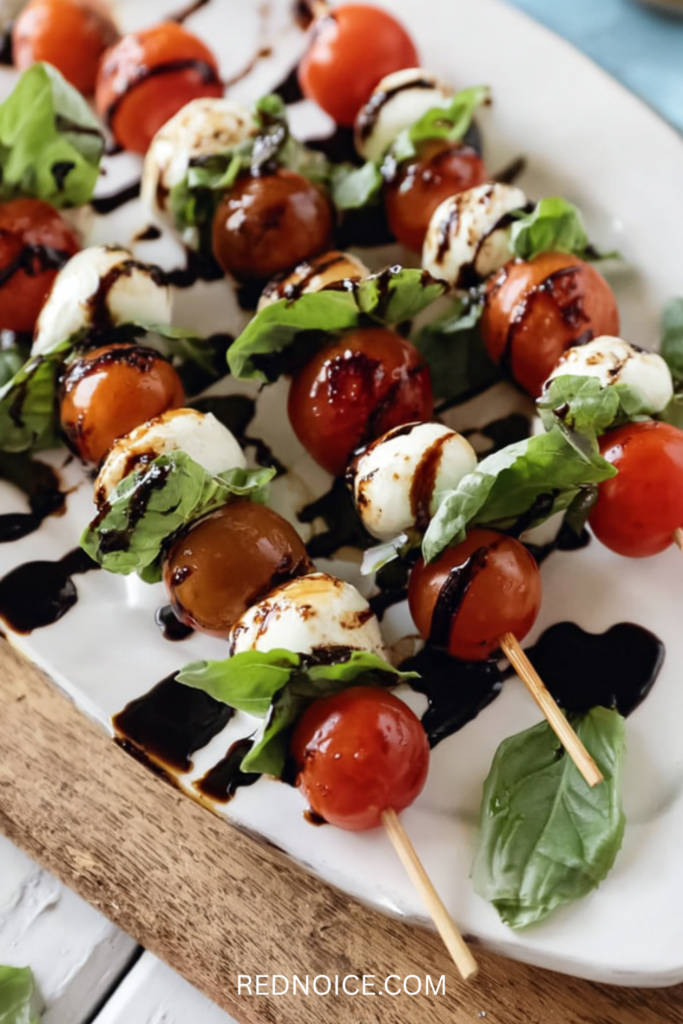
The more elevated version of a picnic skewer. Fresh mozzarella, cherry tomatoes, and basil leaves on cocktail picks, finished with balsamic glaze right before serving. The visual is strong, the flavor is clean, and it pairs naturally alongside sandwiches and salads.
Pack the balsamic glaze in a small sealed container and drizzle it on at the park — it keeps the skewers from getting sticky in transit.
Servings: 6 | Prep Time: 15 minutes | Cook Time: None
Ingredients:
- 1 pint cherry tomatoes
- 8 oz fresh mozzarella balls (ciliegine), drained
- 20 fresh basil leaves
- 2 tablespoons olive oil
- 2 tablespoons balsamic glaze (store-bought or reduced)
- Flaky salt and black pepper
- 20 cocktail picks or small skewers
Instructions:
- Thread one tomato, one basil leaf (folded), and one mozzarella ball onto each pick.
- Arrange in a container. Drizzle with olive oil and season with salt and pepper.
- Pack balsamic glaze separately in a small jar or squeeze bottle.
- Drizzle glaze over skewers just before serving.
Sandwiches & Wraps
Sandwiches are the backbone of any picnic lunch — but not all sandwiches travel equally. The ones below are chosen specifically because they hold up, don’t go soggy in a bag, and taste as good two hours after assembly as they did right after you made them.
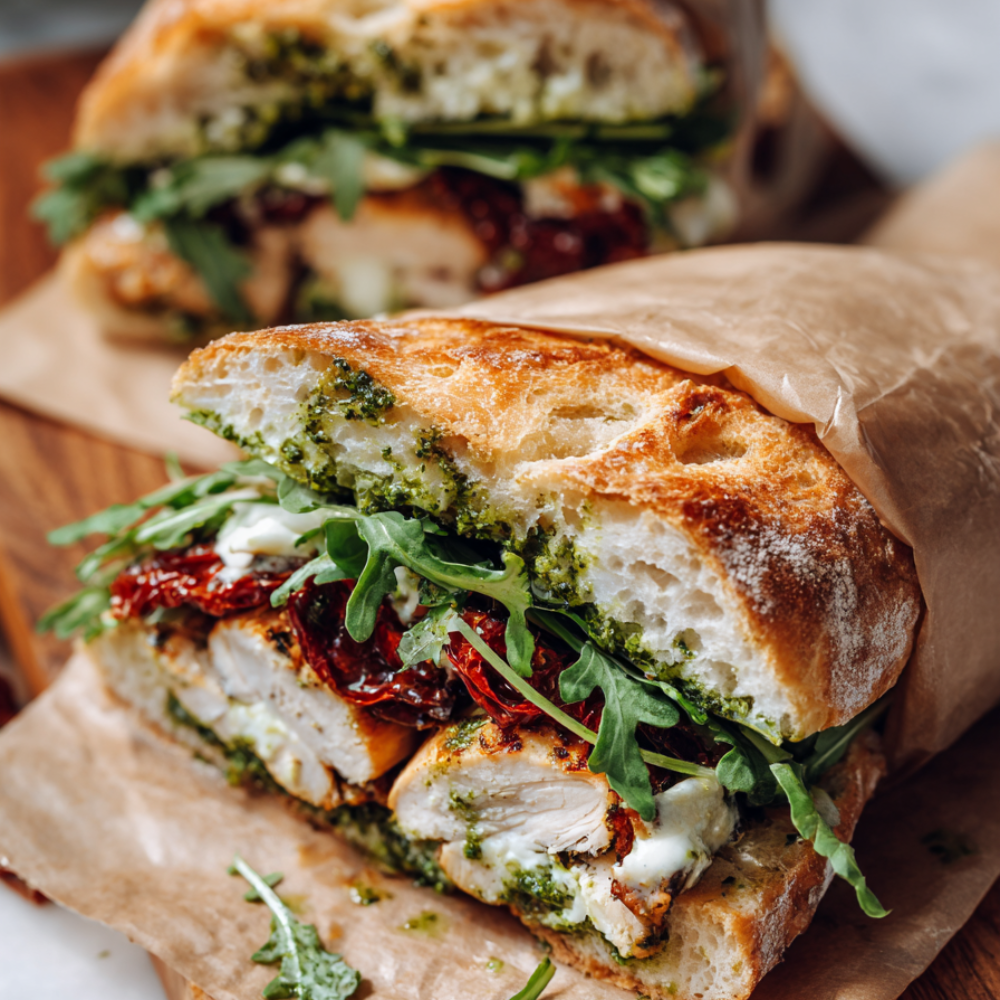
5. Chicken Pesto Caprese Sandwiches
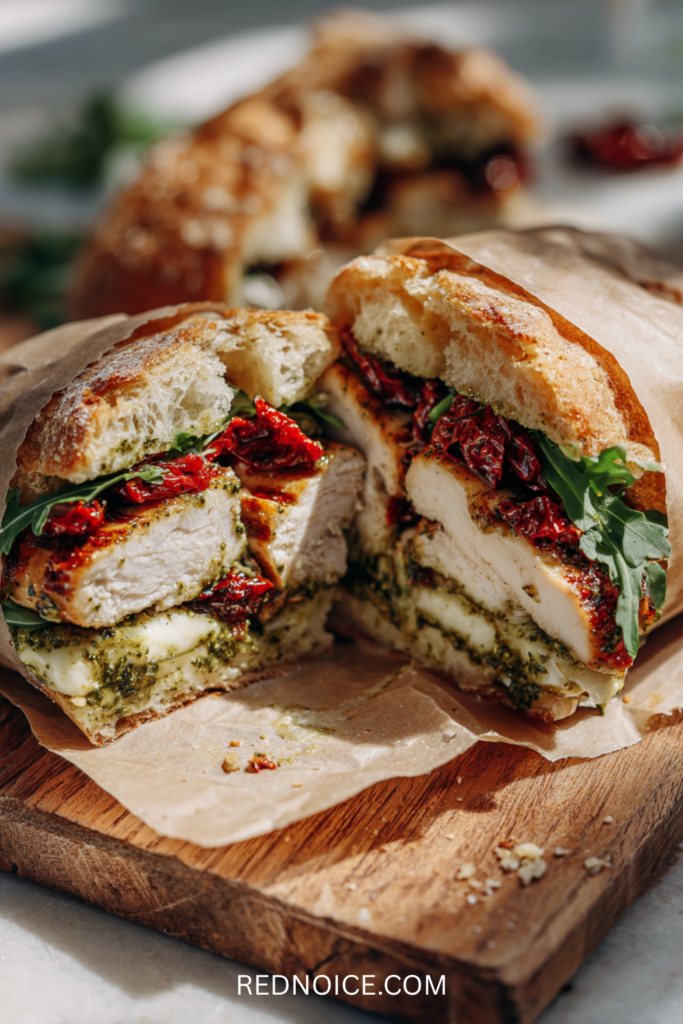
Grilled or rotisserie chicken, fresh mozzarella, sun-dried tomatoes, arugula, and pesto on a ciabatta roll. Ciabatta is the right bread choice here — it has enough structure to stay intact under wet toppings without going soft.
Make these the night before. Wrap individually in parchment paper so they stay pressed and neat, and the flavors meld together in the fridge overnight.
Servings: 4 | Prep Time: 15 minutes | Cook Time: None (if using rotisserie chicken)
Ingredients:
- 4 ciabatta rolls, halved
- 2 cups cooked chicken, sliced or shredded (rotisserie works perfectly)
- 4 oz fresh mozzarella, sliced
- ½ cup sun-dried tomatoes in oil, drained
- 1 cup arugula or baby spinach
- ¼ cup basil pesto (store-bought or homemade)
- Salt and black pepper to taste
Instructions:
- Spread pesto on both cut sides of each roll.
- Layer chicken, mozzarella, sun-dried tomatoes, and arugula on the bottom half.
- Season lightly with salt and pepper. Press the top half on firmly.
- Wrap each sandwich tightly in parchment paper or foil.
- Refrigerate until ready to pack. Slice in half just before serving if preferred.
6. Cucumber Tea Sandwiches
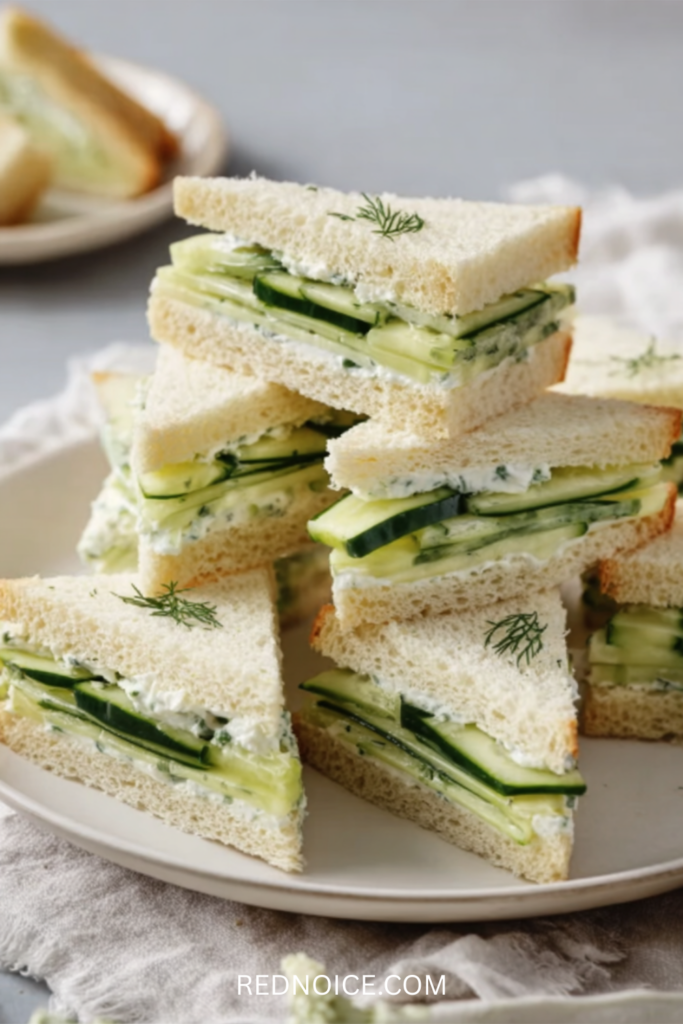
Delicate, elegant, and genuinely good. These are the sandwiches people reach for at outdoor events before they even see what else is on the spread. Thin cucumber slices, herbed cream cheese, and soft white bread — that’s the whole recipe.
Use a good-quality sandwich bread and cut the crusts off cleanly. Stack them in a lidded container with a sheet of parchment between layers to prevent sticking.
Servings: 6 | Prep Time: 15 minutes | Cook Time: None
Ingredients:
- 1 loaf white sandwich bread, crusts removed
- 8 oz cream cheese, softened
- 2 tablespoons fresh dill, chopped (or 1 tsp dried)
- 1 tablespoon fresh chives, minced
- ½ teaspoon garlic powder
- ½ teaspoon lemon zest
- 1 large English cucumber, thinly sliced (about ¼-inch rounds)
- Salt and white pepper to taste
Instructions:
- Mix cream cheese with dill, chives, garlic powder, and lemon zest until smooth.
- Spread a generous layer on one side of each slice of bread.
- Layer cucumber slices on half the bread slices, slightly overlapping.
- Press the top slices on firmly. Cut diagonally into triangles or rectangles.
- Pack in a single layer in a sealed container, separating layers with parchment paper.
- Keep refrigerated until serving.
7. BLT Wraps with Avocado
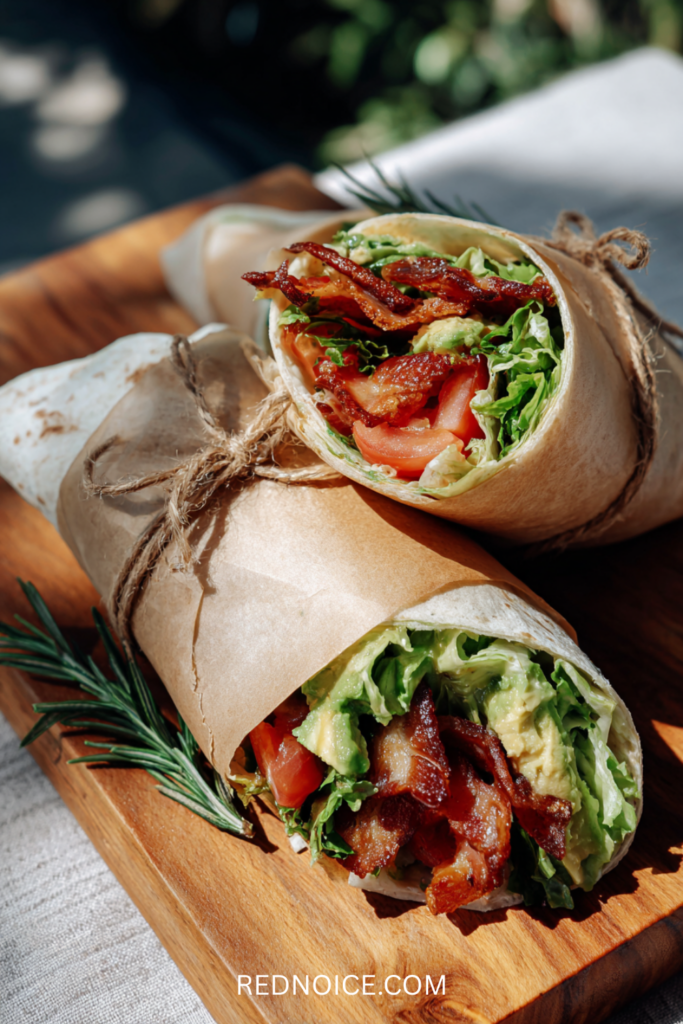
A BLT that travels without falling apart. Tortillas hold up far better than sandwich bread for anything with tomatoes, and the avocado adds enough fat and creaminess that you don’t need much else. Make these the morning of — or wrap the components separately and assemble at the park if you’re worried about the tortilla getting soft.
This one scales easily for groups: double the batch, roll them all, and slice into pinwheel rounds for a crowd-friendly presentation.
Servings: 4 | Prep Time: 15 minutes | Cook Time: 10 minutes (for bacon)
Ingredients:
- 4 large flour tortillas (10-inch)
- 8 strips of bacon, cooked crispy and crumbled
- 2 cups romaine lettuce, chopped
- 2 medium tomatoes, diced and patted dry
- 2 ripe avocados, mashed
- 2 tablespoons mayonnaise
- 1 tablespoon lemon juice
- Salt and black pepper to taste
Instructions:
- Mash avocado with lemon juice, salt, and pepper.
- Spread avocado mash across each tortilla, then spread a thin layer of mayo.
- Layer lettuce, tomatoes, and crumbled bacon over the bottom half of each tortilla.
- Roll tightly, folding the sides in first. Wrap in parchment paper or foil.
- Refrigerate until packing. Best eaten within 4 hours of assembly.
8. Italian Sub Roll-Ups
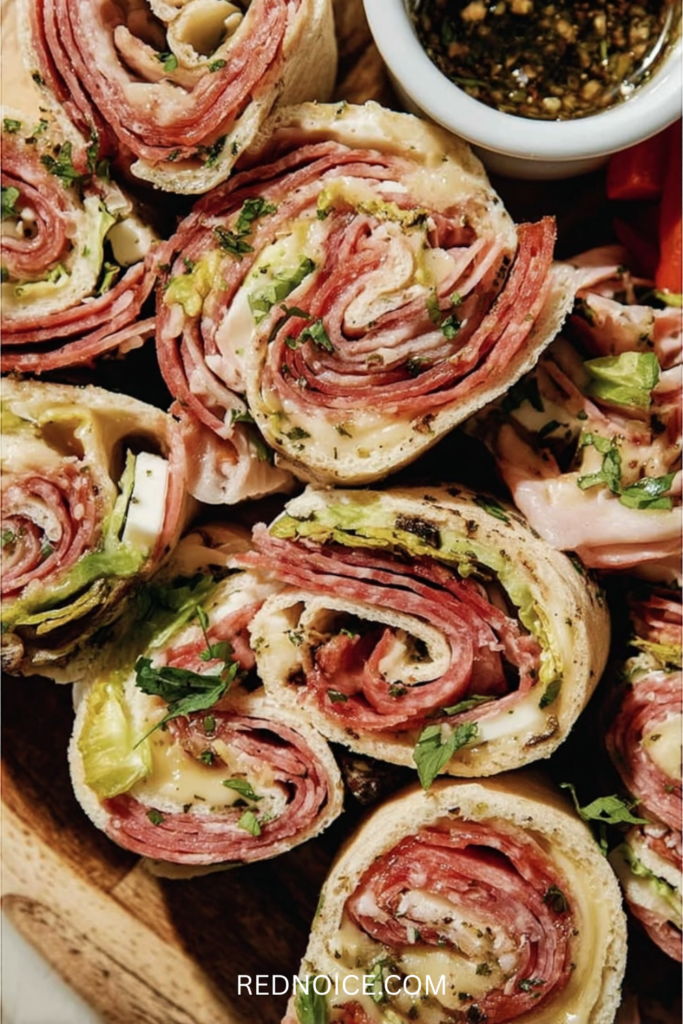
A deli sub, but better for picnics. All the classic Italian sub ingredients rolled into a flour tortilla — salami, ham, provolone, pepperoncini, banana peppers, and a drizzle of Italian dressing. It travels flat, slices cleanly, and tastes better cold than hot.
The trick: press the roll-up firmly, wrap tightly in plastic, and refrigerate at least 30 minutes before slicing. It holds its shape much better when cold.
Servings: 4–6 | Prep Time: 15 minutes + 30 min chill | Cook Time: None
Ingredients:
- 4 large flour tortillas
- 4 oz thinly sliced salami
- 4 oz thinly sliced deli ham
- 4 oz provolone cheese, sliced
- ¼ cup sliced pepperoncini, drained
- ¼ cup banana pepper rings, drained
- 2 tablespoons Italian dressing
- 1 cup shredded romaine or iceberg lettuce
Instructions:
- Lay each tortilla flat. Drizzle lightly with Italian dressing.
- Layer provolone, then salami and ham across the tortilla.
- Add pepperoncini, banana peppers, and shredded lettuce.
- Roll tightly, wrap in plastic wrap, and refrigerate at least 30 minutes.
- Slice into rounds or in half diagonally before packing.
Salads & Sides That Travel
The three salads that made this list were chosen specifically because they don’t wilt, don’t separate, and don’t look sad after sitting in a cooler bag for two hours. They also happen to be the ones that get the most saves — because the “unexpected” angle matters on Pinterest.
9. Street Corn Pasta Salad
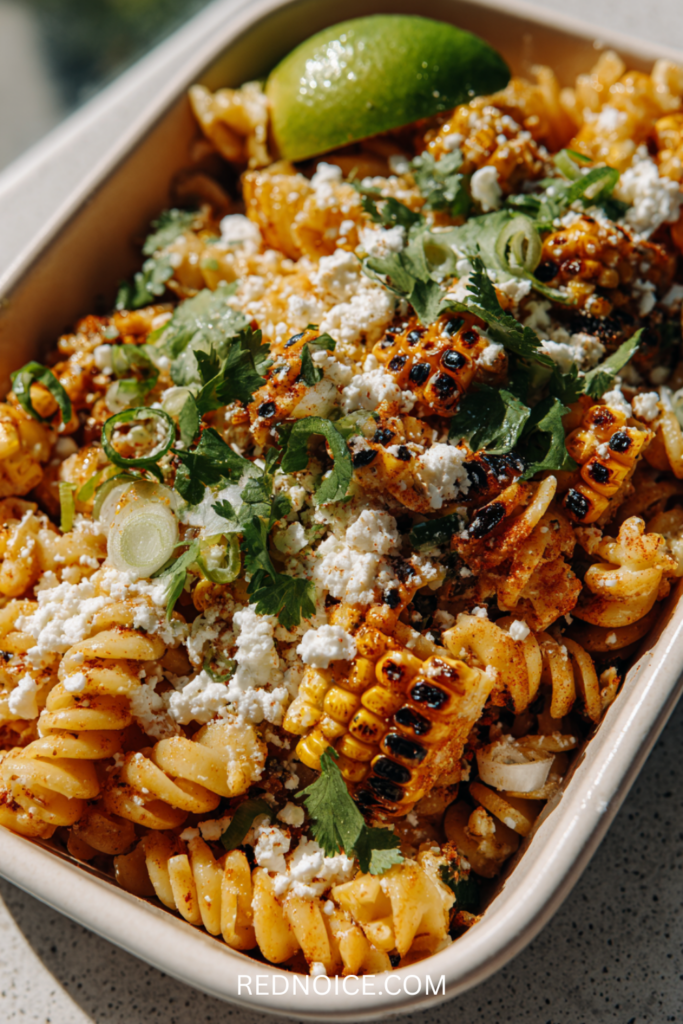
This is the salad people talk about. Charred corn, pasta, cotija cheese, chili powder, lime, and a creamy mayo-based dressing — it’s elote in pasta salad form, and it holds up better at outdoor temperatures than almost any green salad. Make it the night before; the flavors improve as it sits.
Servings: 8 | Prep Time: 15 minutes | Cook Time: 15 minutes
Ingredients:
- 12 oz rotini or elbow pasta, cooked and cooled
- 3 cups corn kernels (fresh, frozen-thawed, or canned — char in a dry skillet for best flavor)
- ½ cup mayonnaise
- ¼ cup sour cream
- ¼ cup crumbled cotija cheese (plus more for topping)
- 2 tablespoons fresh lime juice
- 1 teaspoon chili powder
- ½ teaspoon smoked paprika
- ¼ cup fresh cilantro, chopped
- 3 green onions, sliced
- Salt to taste
Instructions:
- Char corn in a dry cast-iron skillet over high heat for 4–5 minutes, stirring occasionally. Let cool.
- Whisk together mayo, sour cream, lime juice, chili powder, and paprika.
- Combine cooled pasta, corn, cotija, cilantro, and green onions in a large bowl.
- Pour dressing over and toss well to coat.
- Taste and season with salt. Refrigerate at least 1 hour before serving.
- Top with extra cotija and a pinch of chili powder before packing.
10. Watermelon Feta Mint Salad
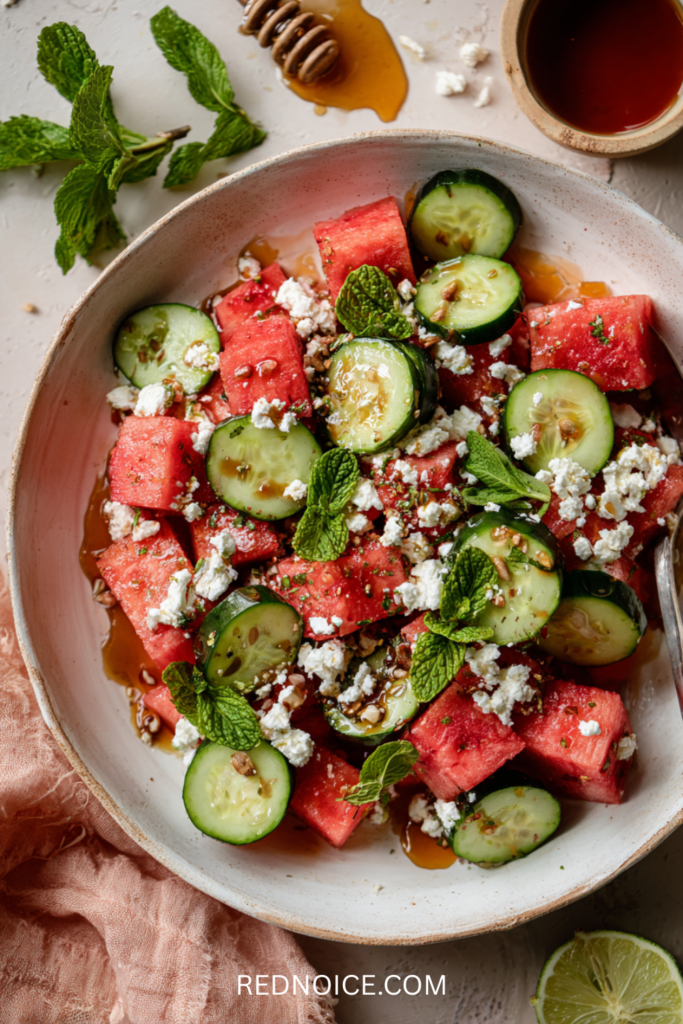
The summer salad that looks like it came from a catering spread, but takes only 8 minutes to make. Watermelon, feta, cucumber, and fresh mint, drizzled with honey and lime. It travels well in a sealed container and tastes better slightly cold.
Pack the mint and any extra lime juice separately and add just before serving — the mint wilts if it sits in liquid for too long.
Servings: 6–8 | Prep Time: 10 minutes | Cook Time: None
Ingredients:
- 6 cups seedless watermelon, cubed into 1-inch pieces
- 1 English cucumber, halved and sliced into half-moons
- ½ cup crumbled feta cheese
- ¼ cup fresh mint leaves, torn
- 2 tablespoons fresh lime juice
- 1 tablespoon honey
- Pinch of flaky salt
Instructions:
- Combine watermelon and cucumber in a large bowl or container.
- Whisk the lime juice and honey together, then drizzle over the top.
- Scatter feta over the salad.
- Pack mint leaves separately. Add just before serving.
- Finish with flaky salt when serving.
11. Broccoli Bacon Salad
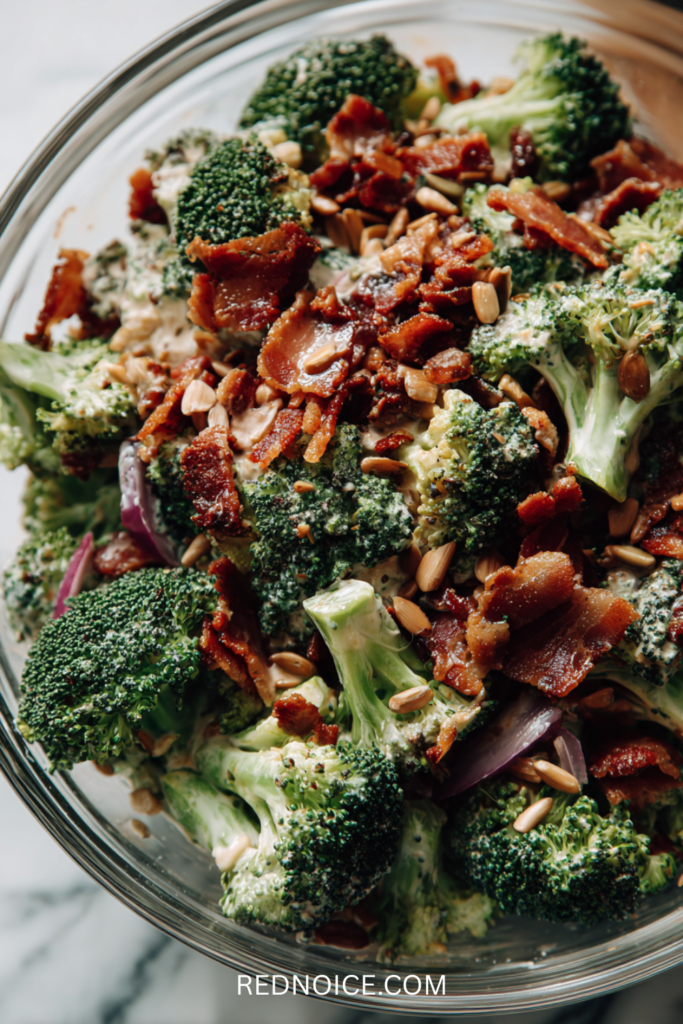
This one earns its place on any picnic spread because it does something most salads can’t: it holds its texture and flavor for hours, even at room temperature. No wilting, no waterlogged greens. Crunchy broccoli, smoky bacon, sunflower seeds, red onion, and a sweet-tangy dressing.
For the full recipe with detailed instructions and make-ahead tips, head to the Broccoli Bacon Salad: The Ultimate Make-Ahead Side Dish for Any Occasion post — it’s worth bookmarking on its own.
Why it works for picnics: You can make it the night before, and it genuinely tastes better the next day. It’s one of the most reliable make-ahead picnic salads you’ll find.
Sweet Bites & Desserts
Three options that pack well, don’t melt, and don’t require utensils. Any of these works for a birthday picnic spread, a date, or just something to end on.
12. Strawberry Cheesecake Skewers
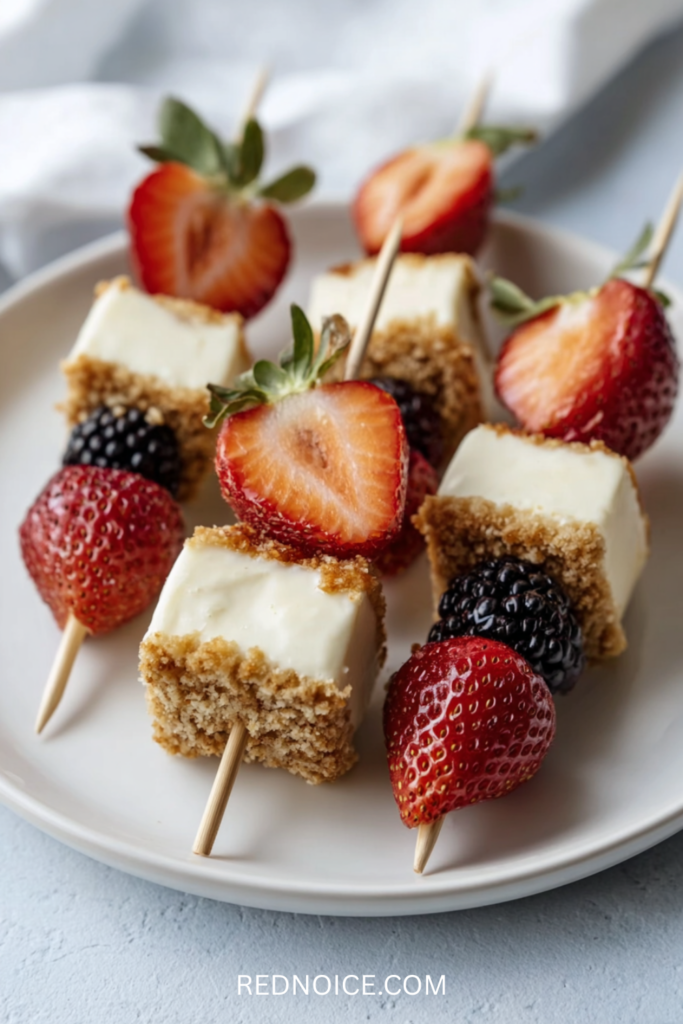
Fresh strawberries and bite‑sized pieces of store‑bought no‑bake cheesecake, threaded on skewers. It looks like a dessert spread that took effort. It doesn’t.
The trick is to buy a pre‑made no‑bake cheesecake (the refrigerated kind from the grocery store bakery or dairy aisle) and cut it into clean cubes. That’s it. No mixing, no rolling, no waiting for cream cheese balls to firm up.
Servings: 8 | Prep Time: 10 minutes | Cook Time: None
Ingredients:
- 1 store‑bought no‑bake cheesecake (about 8‑inch round or square, refrigerated)
- 1 lb fresh strawberries, hulled and halved if large
- 16 small wooden skewers or cocktail picks
Instructions:
- Remove the cheesecake from its packaging. Using a sharp knife, cut into 1‑inch bite‑sized cubes. Wipe the knife clean between cuts to keep edges neat.
- Hull the strawberries. If they are large, cut them in half lengthwise. Leave small strawberries whole.
- Thread one strawberry (cut side facing out if halved) and one cheesecake cube onto each skewer. Alternate or place a strawberry on top – either works.
- Arrange the skewers in a single layer in a flat, lidded container. Keep refrigerated until packing.
Why this works for picnics:
The skewers hold up well in a cooler bag for 2–3 hours. The cheesecake stays firm if kept cold until you leave, and the strawberries add fresh, bright flavor. No utensils needed, and they look impressive with almost no work.
13. Brownie Bites
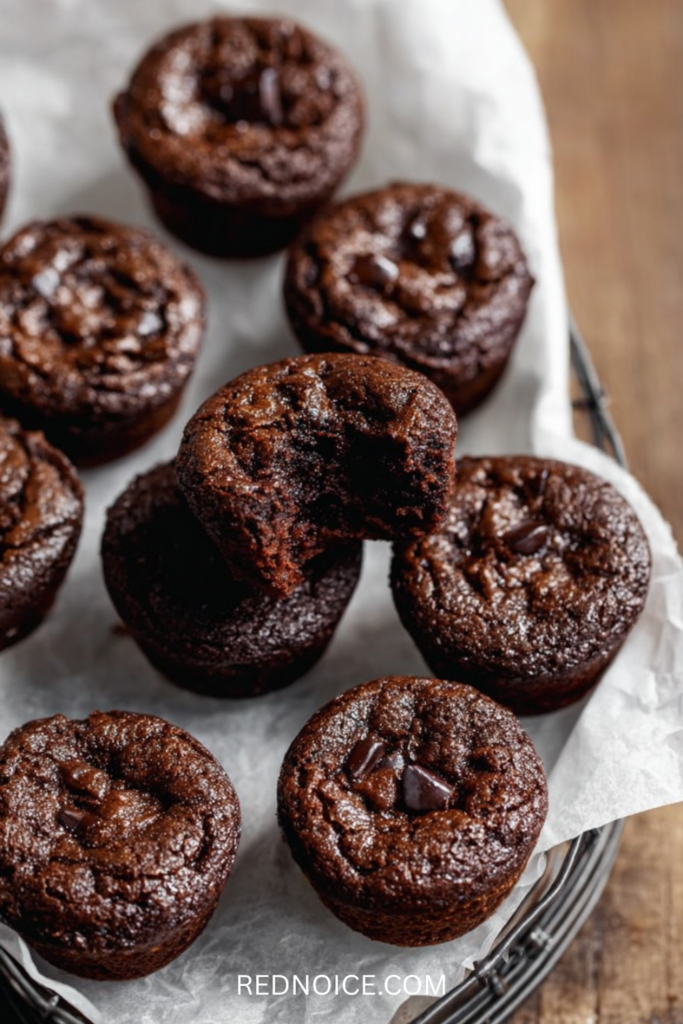
Portable, fudgy, and disappear within minutes of setting them out. For a recipe that genuinely delivers on texture, the zucchini brownies from our 12 Easy Zucchini Recipes for Summer article are the ones to use — bake them in a 9×13 and cut into small 1-inch squares for picnic-ready bites. The zucchini keeps them moist for days, which makes them ideal for packing ahead.
Bake the day before, cool completely, and pack in a single layer in a container. They hold at room temperature for up to 3 days and won’t crumble in a bag the way drier brownies do.
Drinks Worth Making
14. Infused Lemonade (Two Ways)

Make-ahead, travels in a sealed jar, and looks far more intentional than a can of soda. The base is simple lemonade — fresh lemon juice, water, and sugar syrup. What you add to it is where the variation comes in.
Servings: 8 | Prep Time: 10 minutes | Cook Time: 5 minutes (for syrup)
Simple Syrup Base:
- 1 cup sugar
- 1 cup water — simmer until dissolved, cool completely
Lemonade Base:
- 1 cup fresh lemon juice (about 6–8 lemons)
- 4 cups cold water
- 1 cup simple syrup (adjust to taste)
Variation 1 — Strawberry Mint: Add ½ cup muddled fresh strawberries and 8–10 fresh mint leaves to the base. Strain before bottling.
Variation 2 — Cucumber Basil: Add ½ cup thinly sliced cucumber and 6 fresh basil leaves. Let steep 30 minutes in the fridge, then strain.
To pack: Fill a large sealed jar or pitcher. Keep it in the cooler bag. Bring cups with ice in a separate sealed bag.
Tips for Packing a Picnic That Actually Works
A few practical things that make the difference between a picnic that feels effortless and one that’s a soggy mess by the time you get there.
What travels well vs. what doesn’t
Foods that handle heat and movement: pinwheels, pasta salads, cheese and fruit skewers, wrapped sandwiches, brownies, anything in a sealed container.
Foods that don’t: leafy green salads without dressing, packed separately, sandwiches on soft bread with tomatoes directly touching the bread, anything with whipped cream.
Pack in the right order
The heaviest items are at the bottom of the bag. Anything that could leak — dressings, sauces, lemonade — in a separate sealed pouch. Cold items next to the ice pack, not beneath it.
Make-ahead timeline
- Night before: pinwheels, pasta salad, broccoli salad, brownies, lemonade syrup
- Morning of: sandwiches, skewers, lemonade assembly, wraps
- At the park: drizzle balsamic on caprese skewers, add mint to watermelon salad, set everything out.
Container tip: Flat stackable containers with locking lids are worth the investment if you picnic more than twice a year. Everything stays put, nothing leaks, and the whole bag is easier to carry.
The Takeaway
The best picnic food ideas aren’t the most elaborate ones. They’re the ones that were planned ahead, packed well, and actually hold up between the kitchen and the blanket.
This list covers the full range — finger foods that feed a crowd, sandwiches that travel clean, salads that don’t wilt, and sweets that don’t require refrigeration. Pick four or five items that match your occasion, make most of them the night before, and you’ve got a spread that looks like real effort without most of the work.
Save this list for your next outdoor meal. You’ll want it more than once this season.